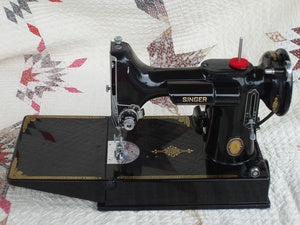
How to Free-Motion Quilt on a Singer Featherweight
You can follow along with the video tutorial below for how to free-motion quilt on your Singer Featherweight or read through the text further down.
Click Here To Order Embroidery Foot
Click Here To Order Embroidery Foot
The foot I am demonstrating today is a new, all-metal, low shank embroidery and darning attachment. If you have a 221 Featherweight, you will need to cover your feed dogs so that they are disengaged, enabling you to move around and stitch in any direction. We now have a feed cover plate replicated from an original. It works perfectly by snapping in place over the feed dogs on your Singer 221.

Featherweight 221 Model
Click Here To Order Feed Cover Plate
If you have a 222, then you will need to lower your feed dogs by moving the front lever from “Sew” to “Darn”.
Featherweight Free-Arm 222 Model
When adding a feed cover plate to the 221 model it decreases the space under the foot ever so slightly. This minimal difference can alter stitch formation when using the exact same embroidery attachment on a 221 versus a 222. That's why it is important to specify which machine you will be free-motion quilting when choosing the appropriate attachment. The attachments designed for the 221 are made to accommodate this spatial constraint so that you can still move your quilt freely under the needle and likewise for the 222.

Embroidery Attachment and Feed Cover Plate for a Singer Featherweight 221
Sometimes called a hopping foot, the embroidery attachment lifts with the rise of the needle allowing you to move in any direction. As the attachment falls with the needle, it holds the fabric momentarily in place as the stitch is placed. The placement of the foot as it holds the fabric is affected by the spatial difference and whether there is or is not a feed cover plate. So, definitely specify which model you need the attachment for.

As you can see in this comparison photo it is fashioned similarly to a vintage embroidery attachment from about the 1930’s. The new one is a better design, however, because instead of a narrow wire which has a tendency to shift, this new one is very sturdy, capable of handling lots of movement – great for free-motion quilting!

You can attach the foot to your machine in one of two ways. I have gotten used to just pinching and gripping with my right hand, but this can be a bit tricky and hard on the hands, so my husband, Carmon, helped show me a second and much easier way (thanks, honey!). I photographed it for you below.
Either remove the needle and attach the foot without the needle in place or make sure the needle goes through the center of the foot.

Set the foot just below the presser bar and center the hole on the foot with the needle hole.

Lower the needle bar as far as it will go, making sure the spring bar rests above the needle bar as indicated by the arrow above.
Tilt the foot so that the forks are situated and aligned over the screwhole on the presser bar. Screw the foot in place using your machine thumb screw.
Raise the needle bar, thread your needle if you haven't already done so and attach the feed cover plate for your 221 Featherweight or lower the feed dogs on your 222 Featherweight.
Things to remember:
- Quick, long movements will gain longer stitches in your quilting. Slow, short movements will result in shorter stitches.
- Increase the tension on your presser bar when working with thicker, heavier fabrics.
I realize it may seem counter-intuitive to increase the pressure on the presser foot, but it is usually required to compress the multiple layers of fabric just enough so that a proper stitch forms. The batting ultimately acts like a spring, pulling the thread loop at the eye of the needle closed. This causes the hook to miss the loop resulting in a missed stitch. This increased pressure is released, however, with each up-stroke of the needle (and hopping of the foot) allowing the fabric to be moved in any direction.
- Start out practicing on smaller projects, such as a mug rug or placemat and work your way up to a table runner or baby quilt.
- When doing a baby quilt or anything larger, you will need to take frequent breaks so as not to heat the motor for too long of time periods. Breaking a baby quilt into quarters and letting the motor cool completely in between each section is recommended.
- Larger thread spools are advantageous for continual sewing, but they greatly affect tension due to their weight. Therefore, it is recommended that you use a Thread Stand designed for your Featherweight because it lifts the thread up off the spool and loosely guides the thread to the needle without any added tension.
Send us photos of what you make! Happy Featherweight Sewing!


