Featherweight Embroidery: Part 2 ~ Stitch Progress
Welcome back to the Featherweight Embroidery! It is exciting to see the progress we have made in the last week! The sewing machine has taken shape and we will be learning a new stitch in today's tutorial!


Order "A Quilter's Dream" Featherweight Embroidery Kit in your color preference (Vintage Autumn or Lori Holt Sewing Happy)
Supplies Needed:
- Vintage Autumn Featherweight Embroidery Kit - If it is sold out, you can sign up for the in stock notification at product link, and you will be notified as soon as we have more kits available.
- 4-inch or 6-inch Embroidery Hoop
- Glass-Head Pins
- Iron
- Sewline Water Erasable Roller Ball Pen
- Embroidery Scissors
- Hand-sewing needles in various sizes
- Needleminder
- The Beekeeper Thread Minder by Lori Holt
- Already have the supplies on hand?
Printed Pattern only is available here.
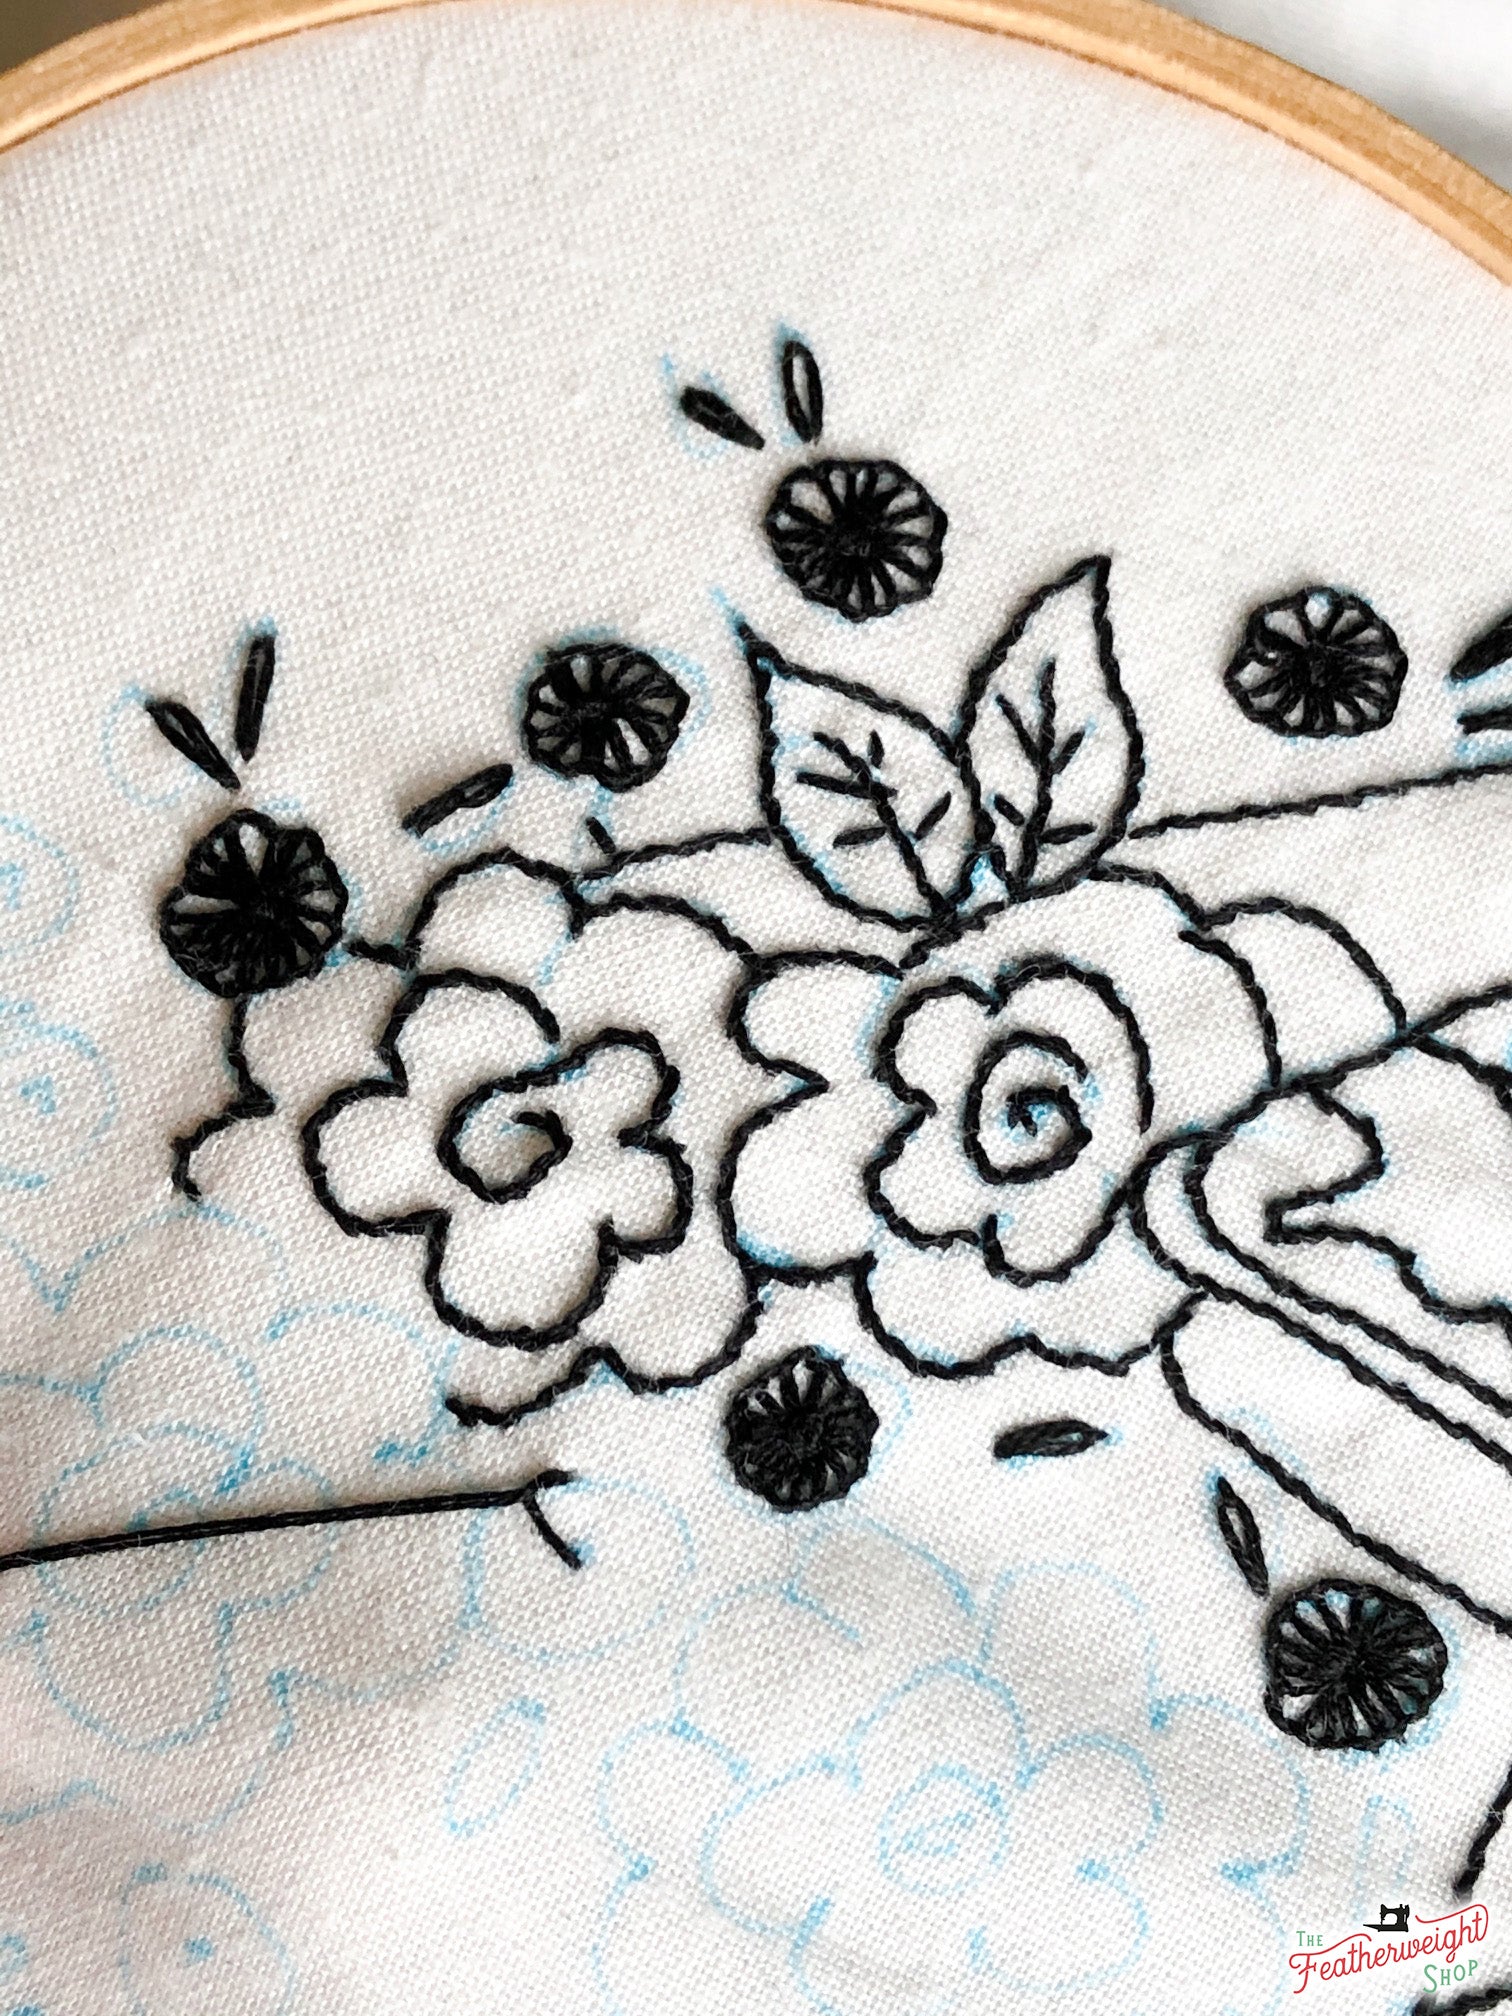
After a week's work on the embroidery for this pretty Vintage Autumn Featherweight Embroidery Kit from The Featherweight Shop, I have the quilt finished, the sewing machine base done, and have started on the flowers. It's encouraging to see the majority of the embroidery done.

I was surprised by how much time stitching the quilt took – there are so many lines in so many directions! Sometimes I would have to stop and plan out my “route” for the next few lines. Thankfully, if you do need to skip a small distance, stitching through the 2 layers of included fabric means that even with black thread, any threads on the underside do not show through.
(If you notice some lint clinging to the cloth, coming from the black embroidery thread, don't panic! When we are done stitching I'll show you how to easily remove the lint before it's time to frame.)

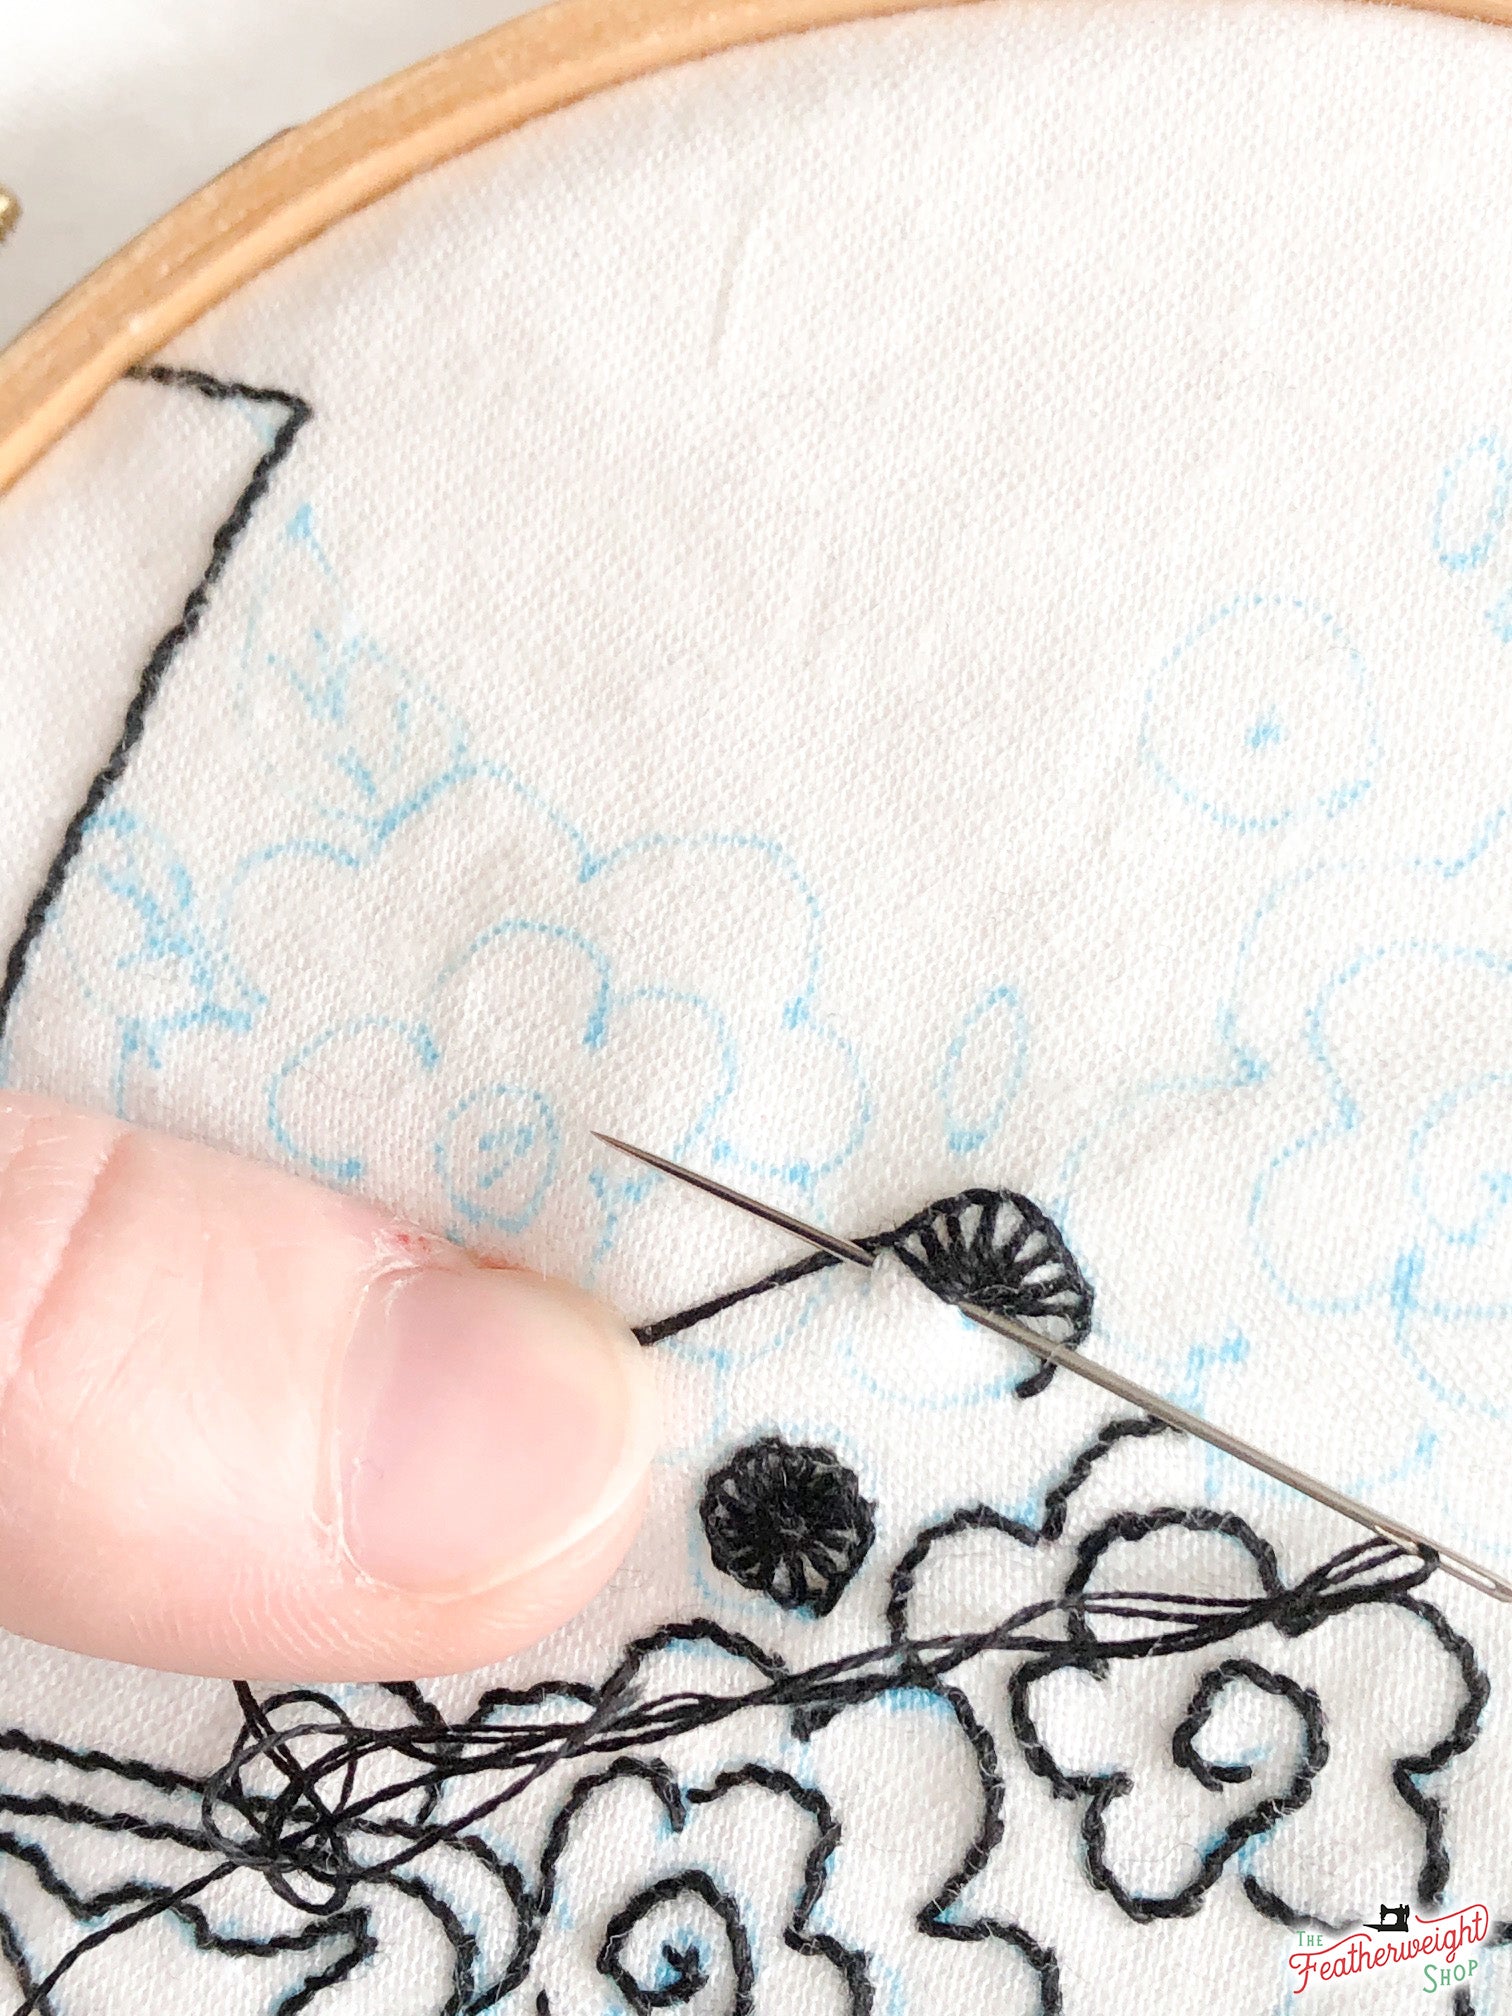
If you are working in the same order as I am, you'll have a few new stitches to learn once you get to the flowers. The round flowers are made with a buttonhole stitch. The diagram is pretty clear, in the instructions, and I found it easy to figure out how to do the stitch after studying it a bit.
First you bring up your needle in the center dot of the round flower.

Insert the needle in the outer rim of the circle, and bring the tip through just a tiny space away from where you went in.

Bring up the thread so it's under the tip of the needle.

Pull the thread through, catching the loop that was under the needle. It should be sort of L-shaped.

For the second stitch, insert the needle back in the center, and through again on the outer rim just a tiny space away from your last stitch, with your thread underneath the tip before you pull through.

Pull through and continue around. Keep in mind that the shorter the space between your outer rim stitches, the more dense this flower will be.

When you're all done going around the circle, bring your needle up in the center one more time, and finish it off with a French knot.

The other specialty stitch that is used is a lazy daisy stitch. It's a common one, but just in case you need a refresher, you simply bring up your needle at the bottom tip of the oval.

Pull the needle out through the opposite end of the oval, catching your thread underneath to form a loop.

Pull snug (not too tight) and secure with a tiny stitch at the end of the loop.

That's it! All the rest is the same running stitch we already learned, and it goes rapidly. I just have some flowers and most of the Featherweight yet to stitch. I'll keep at it this coming week. It's enjoyable to watch the way the thread lines grow as they cover the blue markings, bringing the picture alive.

See you next week!
Kristen
< Autumn Vintage Part 1 Autumn Vintage Part 3 >

