
How to Clean and Replace the Felt Drip Pad Liner on a Singer Featherweight
Today at The Featherweight Shop, Carmon and Ruthie will be showing you how to change the Felt Drip Pad on your Singer Featherweight properly! The felt drip pad that is underneath absorbs excess oil and, if heavily saturated, probably needs replacing. Not only will it take care of a simple routine maintenance for your machine, but it can also help eliminate some of the old musty odors that tend to collect from having been in storage for many years.

Felt Drip Pad Replacement Video Tutorial:
Felt Drip Pad Replacement Tutorial Tools:
- 1. Putty Knife
- 2. Latex Gloves
- 3. Kerosene, Rubbing Alcohol, or Ronsonol Lighter Fluid
- 4. Paper Towels
- 5. Safety Glasses
- 6. Felt Drip Pad

This process kind of reminds me of cleaning out from behind the kitchen stove. All those dust bunnies, lint, and kitchen grease build-up - you know it’s all there behind your stove, but it's hidden away out of sight, out of mind. That is, until you get the notion to actually pull the stove out and get your elbows in it to clean it all out. But, spring isn’t quite here yet, so we’ll save that major stove-cleaning task for another day. Let’s think about something more fun & gratifying… like cleaning our little Featherweight machine.
Besides, this Tutorial Tuesday is much easier and you can defer the years of grease, oil, and lint to nostalgia and all the pretty things sewn on your machine. (That’s a much better thought anyway!)

Your Singer Featherweight has a Felt Drip Pad located underneath this tray on the bottom of your machine.
Most Singer Featherweights that we receive here in the shop have never had the felt drip pad replaced. The felt often traps the smell of old oils and the mustiness of years of storage, but replacing this pad is relatively simple.
Ruthie, assisting with this Schoolhouse video tutorial, has a foolproof method of replacing and adhering the new felt drip pad to the pan correctly. Before we replace the felt drip pad, however, we need to take the drip pan off of the machine and remove the old felt liner. The bottom drip pan is held on by one large thumb nut. Unscrew the thumb nut and remove the bottom drip pan to access and assess the old felt liner.


(If you own a White Featherweight, this process will not be necessary. Your machine was gifted with an internal maid, so you can go right back to sewing and skip this tutorial….. okay, okay, technically, white Featherweights were provided with a masonite board for the bottom instead of a metal tray and felt drip pad, so that’s kind of like having a built-in maid, right?)


2.) If your felt drip pad isn’t as obvious and gross as the one depicted above, then check to see if your felt drip pad is saturated with oil. Depressing your finger into the felt is the best test. If you have oil residue on your finger then it’s time to change the felt drip pad liner.
3.) If the pad is really stuck on the pan and felt pieces are left behind when you pull the old one off, then you might need to do some scraping with a putty knife.

To remove a really sticky felt liner, you will need a putty knife, latex gloves, kerosene (or rubbing alcohol or Ronsonol lighter fluid), a few paper towels, and don't forget your safety glasses!

If the pad comes right off, great! Pour a little kerosene on the pan and clean the surface so the new pad will stick securely.

If an old liner is really stuck to the pan, pour kerosene on any felt that could not be easily removed and soak for several hours, possibly overnight, depending on the severity of the remaining felt residue. Next, use a putty knife and scrape the pan clean. Repeat this step if necessary.

After the felt is removed, there will most likely be traces of the old glue left, but do not worry! It will not interfere with the new felt sticking down.
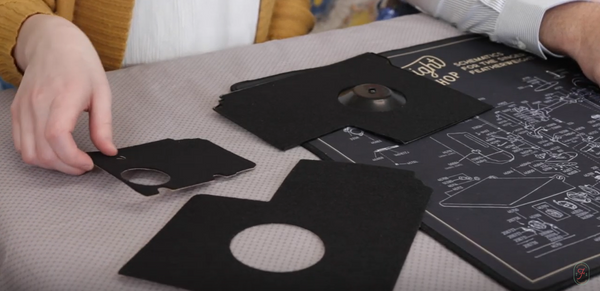
Now that the drip pan is clean, Ruthie will demonstrate her trick to installing the new Felt Drip Pad!
The new felt drip pads have a strong adhesive backing to keep them securely in place. To eliminate misalignment by peeling all the paper off, Ruthie has a fun trick so that the felt drip pad will lay nice and flat and align perfectly with the drip pan tray.
Starting on the narrow side, pull back about two inches of the paper backing and fold it over, making a crease.

Align the felt, beginning at the wide end of the tray (that portion that still has paper attached), working toward the adhesive area. Next, press the sticky part of the felt drip pad into the pan and press it down.

Firmly press the felt drip pad so that the adhesive begins to adhere to the pan. Now that the felt drip pad is somewhat attached and aligns correctly, reach under the pad and grab the paper backing. Slowly remove the paper backing from the felt, while simultaneously pressing the felt into place until the paper backing is completely removed and the felt is securely set in the drip pan.


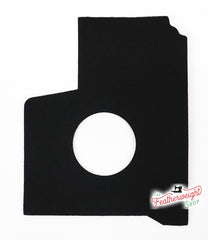
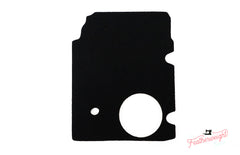
Now you have a fresh Felt Drip Pad perfectly aligned! If the machine is not over oiled, these pads should last at least another decade.
The Felt Drip Pad is available for the Singer Featherweight 221 or 222.
They can be purchased individually or as part of the Tune-Up Kit or Tune-Up Kit Refill!

