
Part 1 of 3 - Featherweight 221 Light Wiring Series
Part 1: A Tutorial on Cleaning the Lead Sheath on a Singer Featherweight 221.
Products & Tools Referenced:
- Light Socket with Sheath
- Wera Safety Screwdriver (also available in the Set of 4)
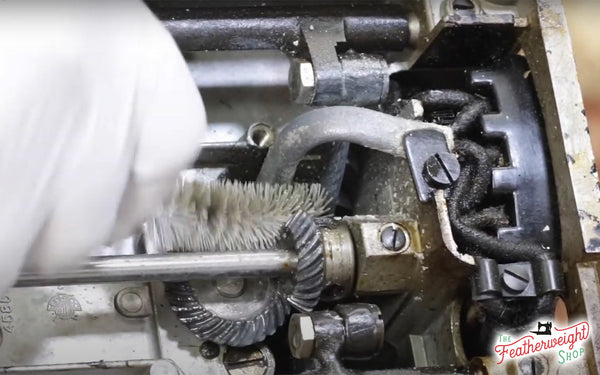
- Gear Cleaning Brush
- Low Odor Kerosene and Long-Spouted Bottle
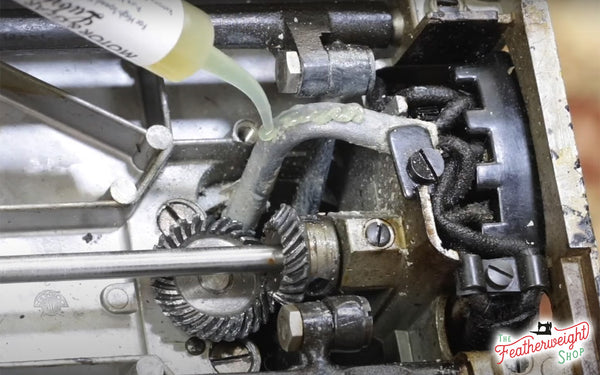
- Sew Retro Grease
- Small Terry-Cloth Towel (for scrubbing)
- Felt Drip Pan
- Large Towel or Shop Rag (for collecting kerosene drips and old grease)
- Gloves
- Mask
- Eye-Protection
The lead sheath on Singer Featherweight 221 models (1933-1957 for US-made Featherweights and 1947-1951 for UK-made Featherweights) covers the light wires and often requires careful cleaning and maintenance if there is any white oxidation present.
In the next tutorial we will actually remove the light wiring and show how to clean, repair or replace those parts. Today is just a basic cleaning.
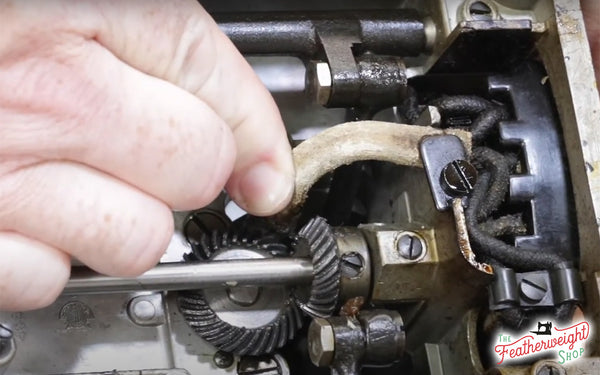
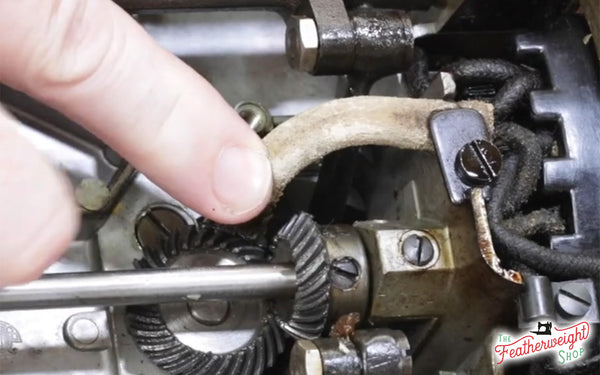
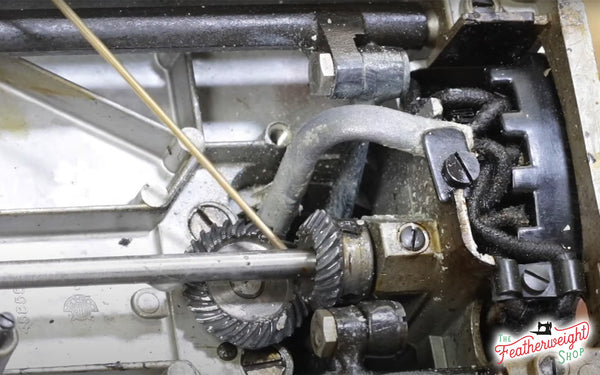
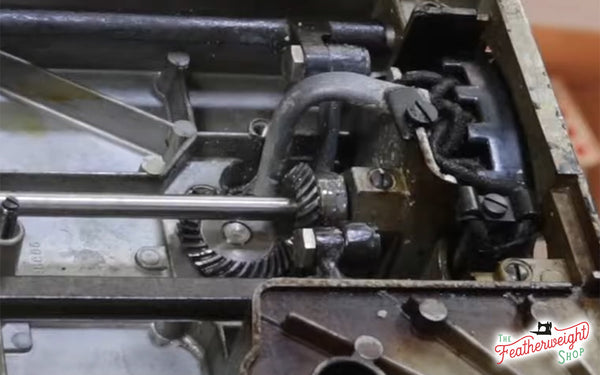
The light for most Singer 221 Featherweights is a simple socket with two wires that are protected by a lead sheath. The lead sheath can be pushed out of the way, keeping the electrical wires from touching the gears.
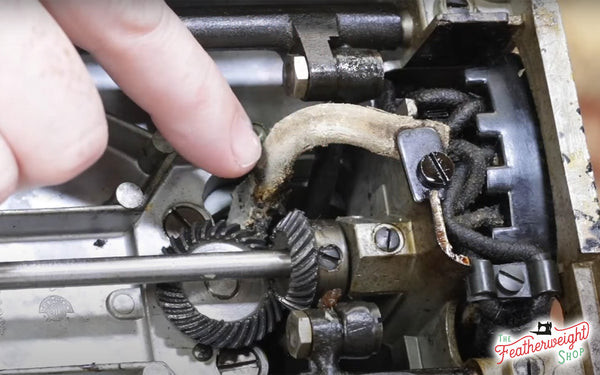
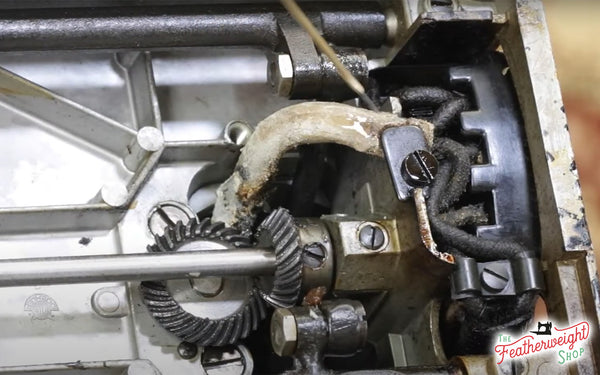
Lead corrodes over time, and this sheath becomes covered with a white, flaky residue. If left for a long time, the residue can fall off, getting into the grease on the gears, potentially slowing the machine's speed and functionality.


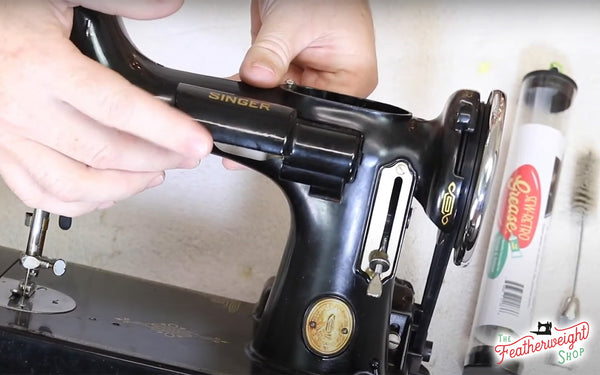
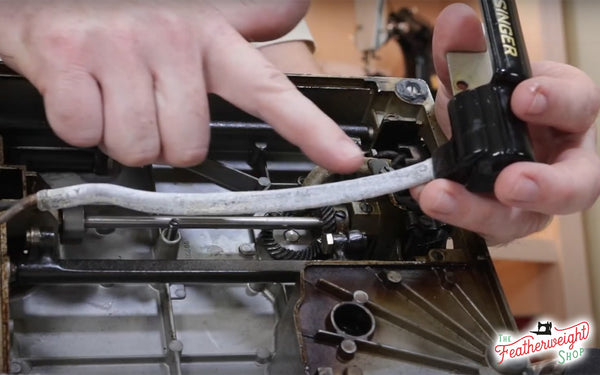
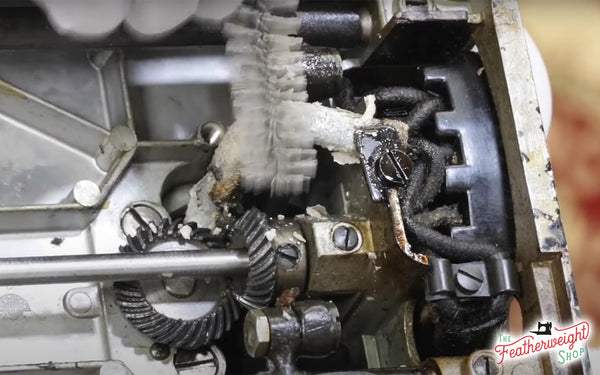
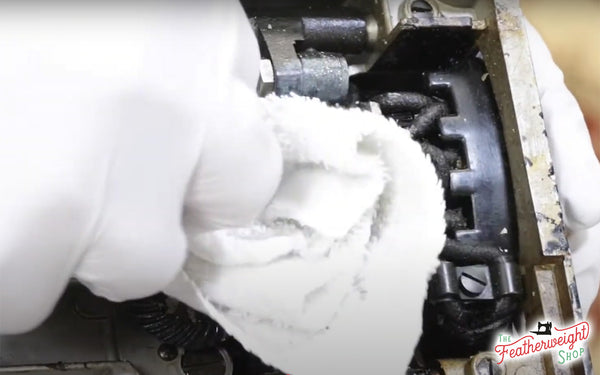
When the sheath is lightly covered with white oxidation, it can be cleaned without the hassle of removing all the wiring from the machine. This area is accessed by removing the drip pan tray on the bottom of the Featherweight. Place the machine on a large towel or shop rag and using the gear cleaning brush, a terry cloth towel and some low odor Kerosene, simply scrub the oxidation away. When working with lead, and because it could get a little messy when cleaning, it is recommended to wear gloves, a mask as well as eye protection.

We put kerosene in the small Empty Oil Bottle for easier direction and cleaning. Scrub the sheath and gears with the gear cleaning brush, flushing with kerosene and wiping away the excess with a terry cloth. Once the white oxidation has been removed, you will want to flush the gears clean with more kerosene.
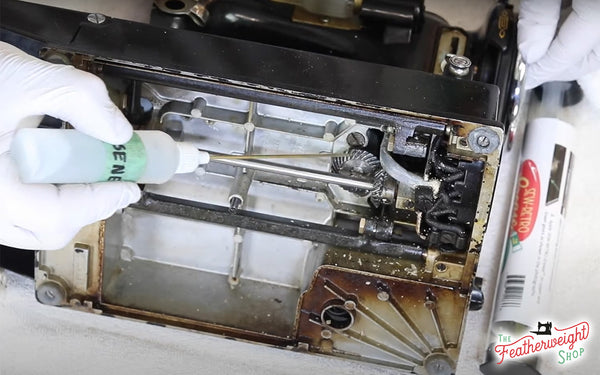
Then, using the Sew Retro Grease, apply a new layer of grease to the gears. I also recommend wiping a little grease on the lead sheath which will keep the oxygen from getting to the lead, slowing the corrosion process. This is a similar concept to putting a little grease on the lead terminals of a car battery - it slows down the corrosion process.
Once the gears are clean and new grease has been applied, this area of the machine is ready to go. That white oxidation takes quite a while to form so these wires should only need to be examined every couple of years or so and cleaned as necessary.
If you haven't already oiled or greased the remainder of your Singer Featherweight, with the drip pan tray off, now is a good time to finish your routine maintenance!
Click here for Part 2 of 3 in our Light Wiring Tutorial Series.