
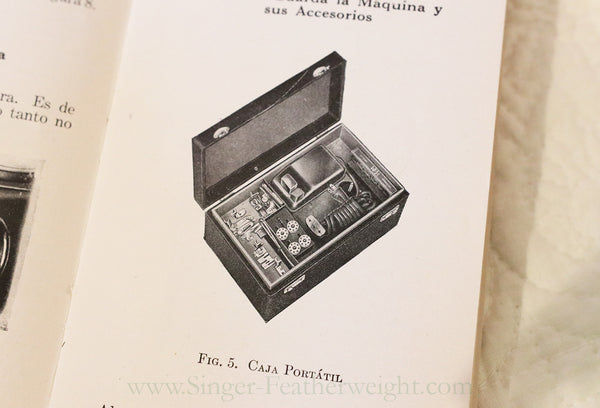
How to Pack up the Featherweight and its Accessories in the Case
One question that we get quite often here in the shop is, "how does everything fit in my Featherweight case?" Singer did change the Featherweight cases throughout the years, so packing everything up wasn't always the same. You might be able to get it all in the Case if you pile it in all randomly, but there is a right and wrong way.
NOTE: The cases shown in this blog post are for the majority of vintage original Featherweight cases. Stay tuned, though, because we will be updating this post for the early style cases as well - they are pretty unique! In the meantime, here is the Featherweight Timeline to see what those early Featherweight cases look like.
#1 Inserting The Oil Can
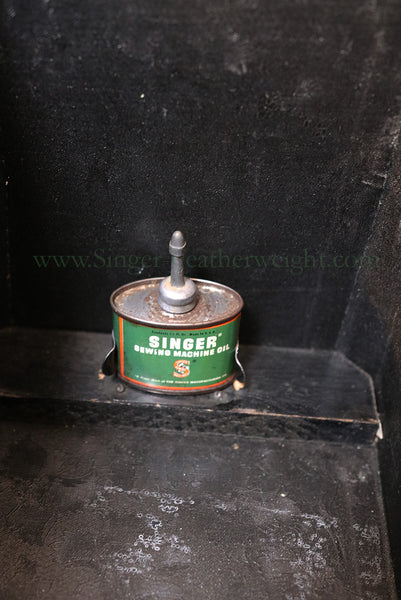
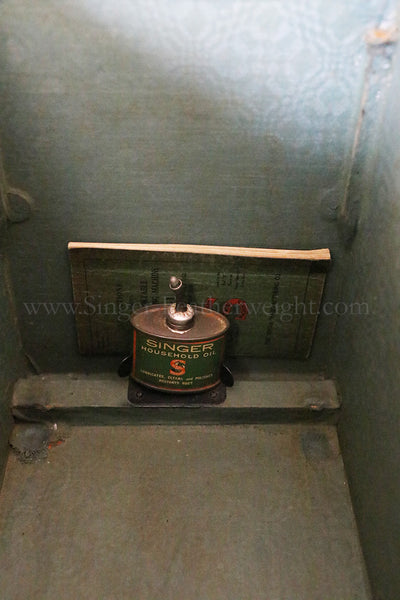
With Black Featherweights, Singer included an oil can. It was (and still is) important that these oil cans remain upright, so Singer provided a convenient holding clip for each oil can style that they produced. If your case has a top tray that spans the whole width of the case, you will have a bracket at the base of the case on the left side. If you have a case with a small tray on the left side, you will have a bracket directly behind the tray for your oil can. Below are some photos of the oil can bracket styles along with their proper oil cans:
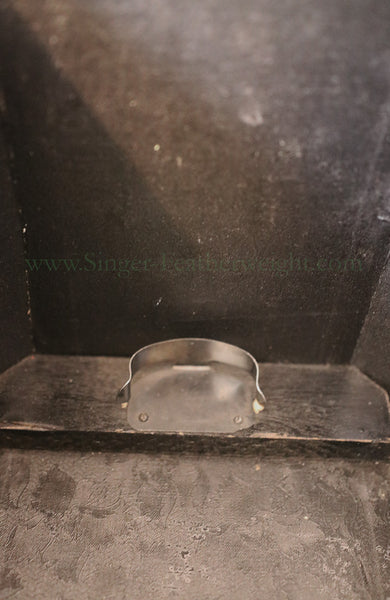
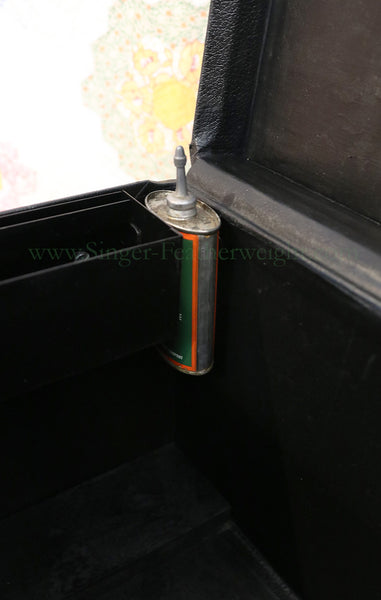
This can and bracket was for all Featherweight 221 cases manufactured in the UK that originally had a top tray as well.
*****
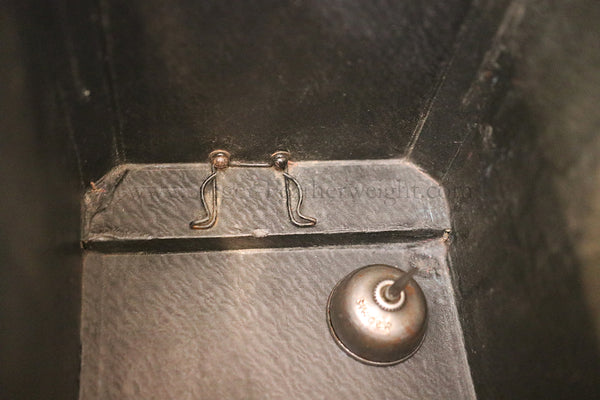
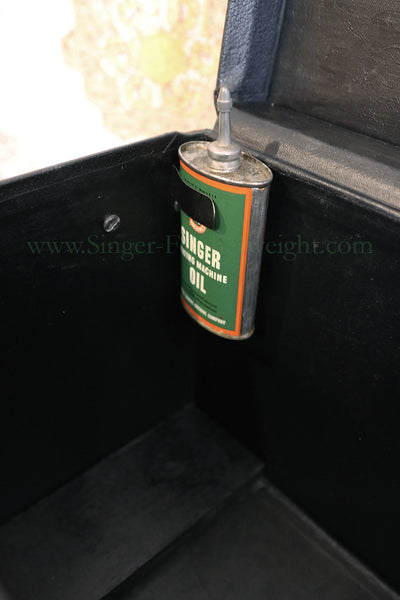
This case clip style is for Featherweight 221 models manufactured in the US that would have also had a top tray in the case.
*****

This case clip style is for the 221 and 222 Featherweights with the side tray in the case.
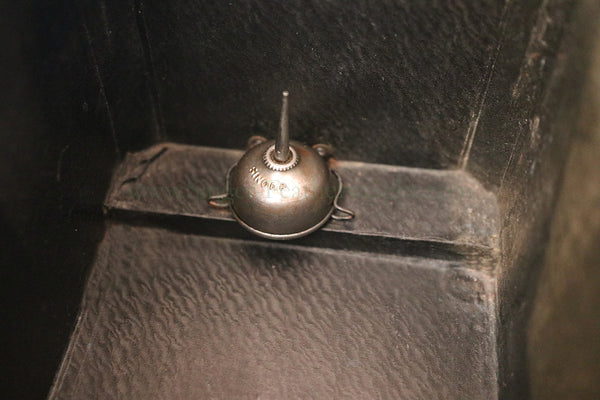
Tray removed so you can see how the oil can is placed.
*****
#2 Putting The Machine in The Case
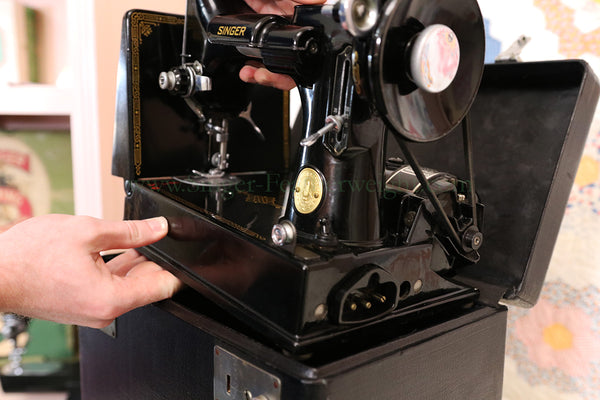
Putting the Featherweight in its case is pretty straightforward - you simply set the machine in the case with the handwheel on the right side and the bed on the left. You will want to do this pretty gently so that nothing gets unnecessarily broken (particularly the terminal receptacle) or the bed of the machine does not hit the faceplate.
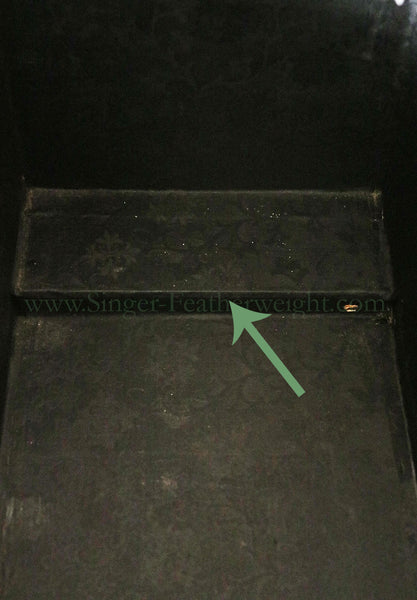
The bed cushion feet of the machine on the left side must be resting up against this wooden block and not setting on top of it.
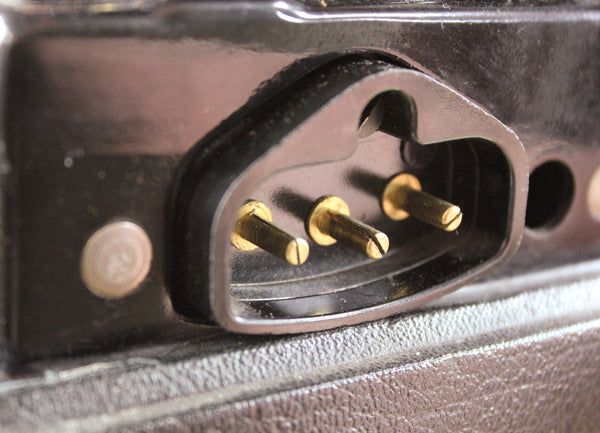
NOTE: The bakelite terminal on the machine can be quite brittle, so you will want to make sure that it does not hit the edge of the case.
#3 The Manual
There is a lot of flexibility with where you can put the manual in the case, but wherever it goes, it is important that it does not get bent. Here are the two best ways that we have found to insert the manual in the case.
In the photo above, you will see the recommended placement of the Singer 221 manual if you have the top tray style Featherweight case.
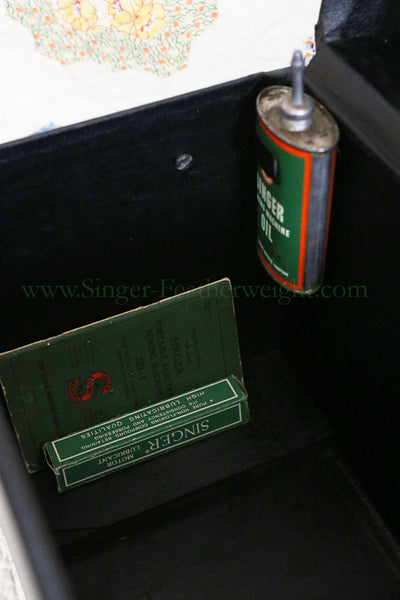
This is where we recommend putting the manual if you have the Side Tray style case.
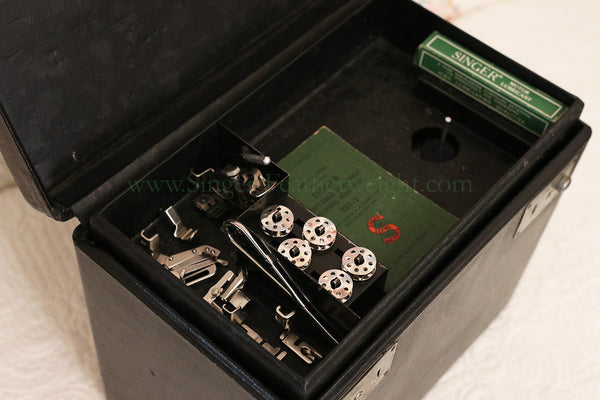
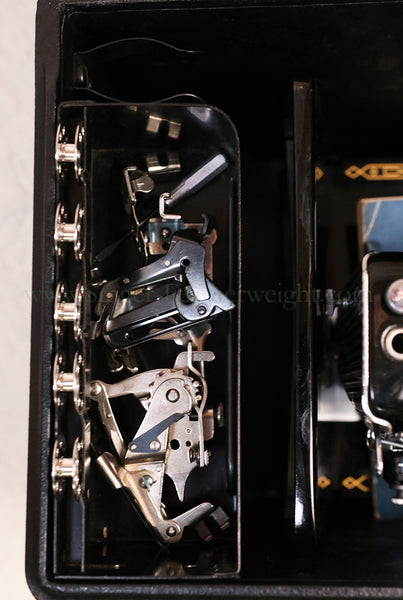
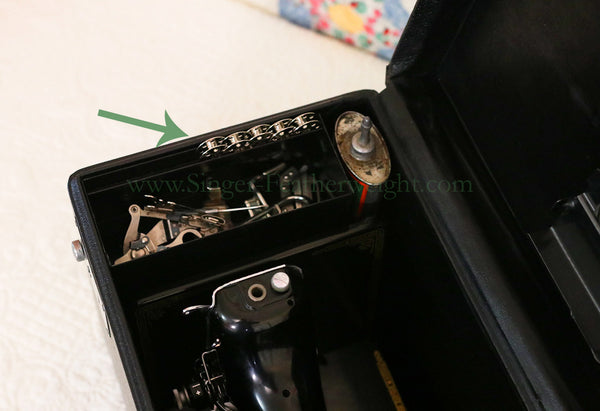
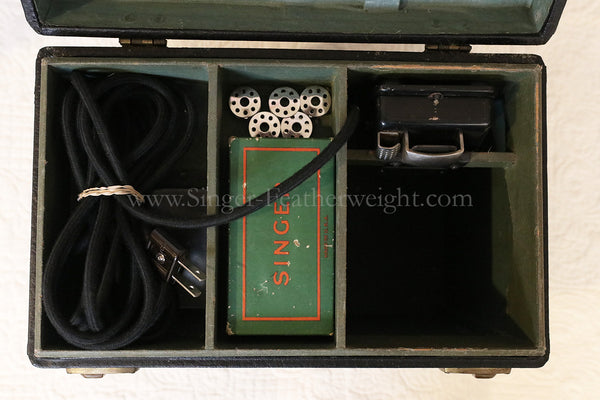
#4 The Attachments and Screwdrivers
It can get a little bit tricky placing and fitting all the attachments and their accompanying box in the case, so here is what we have found as the best way to achieve a proper placement.
In the photo above, the small screwdriver has a slot on the left and the larger screwdriver has its own slot on the right.
This set-up would apply if you have a Top Tray style Featherweight Case, yet do not have the accompanying green attachments box.
You can see here an original illustration in the Singer Featherweight 221 Manual.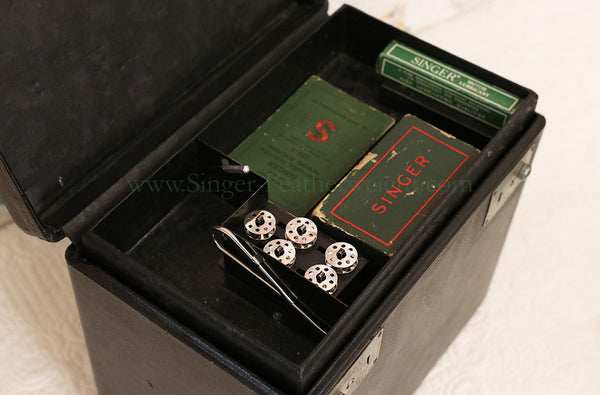
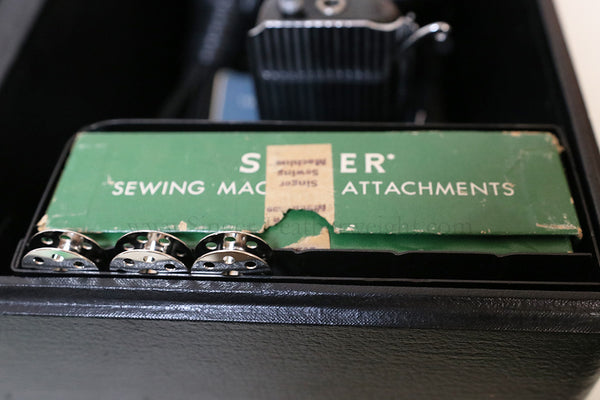
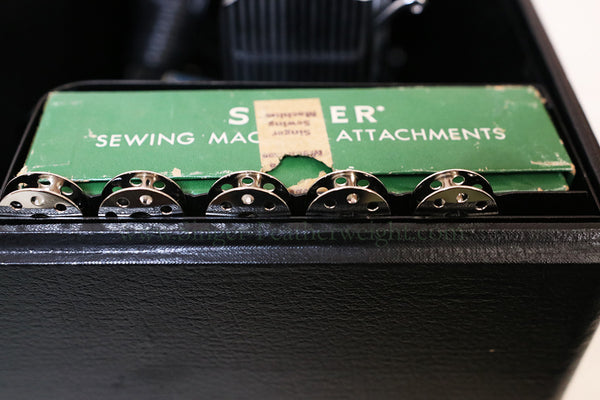
This set-up applies if you have a Top Tray style case and a retained the original green attachments box.

This is the preferred accessory placement if you have the side tray style case and a green attachments box.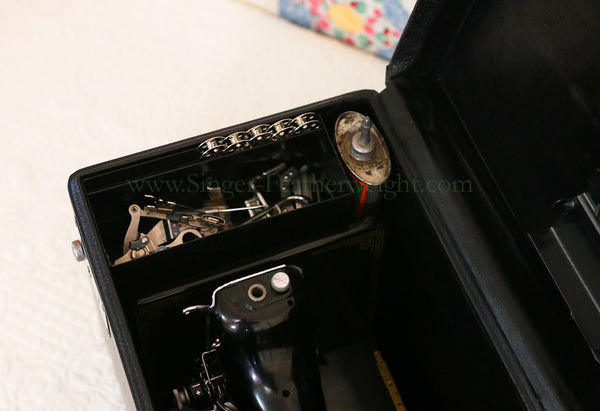
This is the preferred placement of the attachments and screwdrivers if you have a side tray case and no attachments box. Attachments and accessories are more or less randomly placed in the little tray with the bobbins to fit in the slot on the far left side.
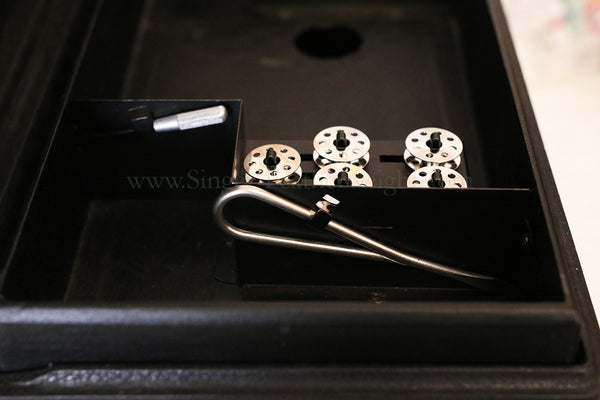
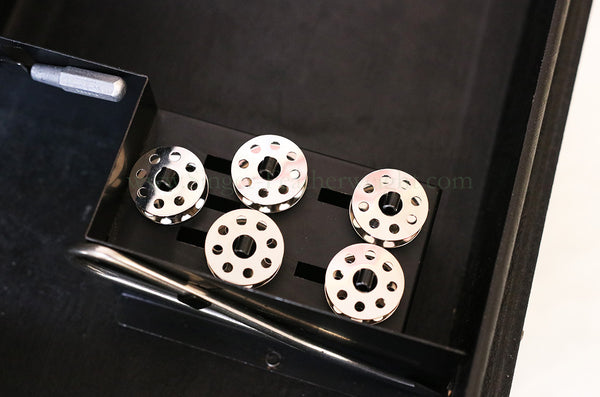
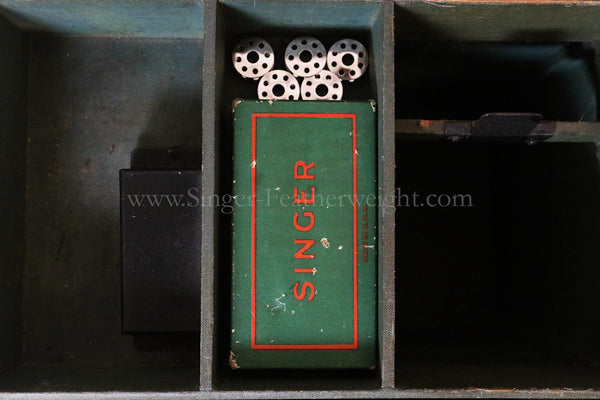
#5 - Bobbins
Speaking of bobbins, Singer conveniently put a spot in the black and tan Featherweight cases for a few extra bobbins.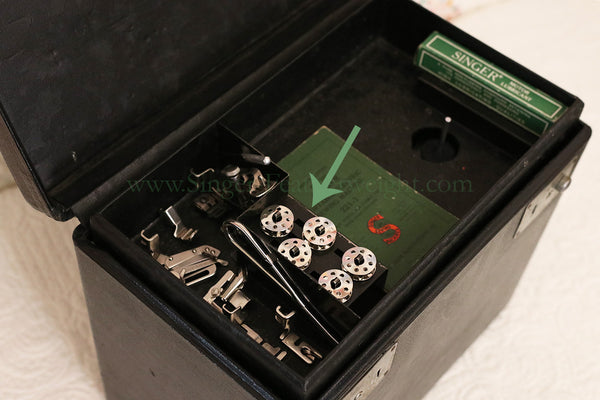
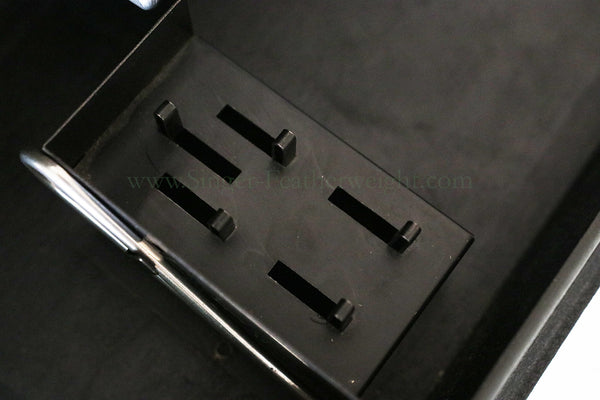
The top tray case has 5 pin braces that hold the bobbins in place.
The side tray cases had the slot on the left side with a spot for each individual bobbin to rest securely.
#6 The Foot Controller
With the Featherweight cases that had the top tray, everything will need to be carefully placed for it to all fit properly, especially if your attachments have the green little box. For Featherweight cases with the foot controller bracket in the top, however, fitting the controller in the case is no problem at all. Below are a series of photos to show you proper placement depending on your case style and what accessories you have included with your machine.
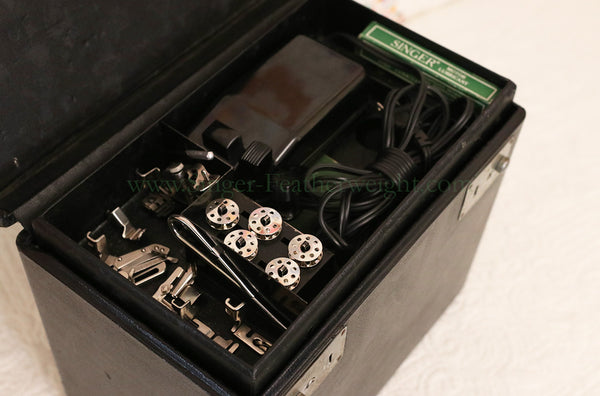
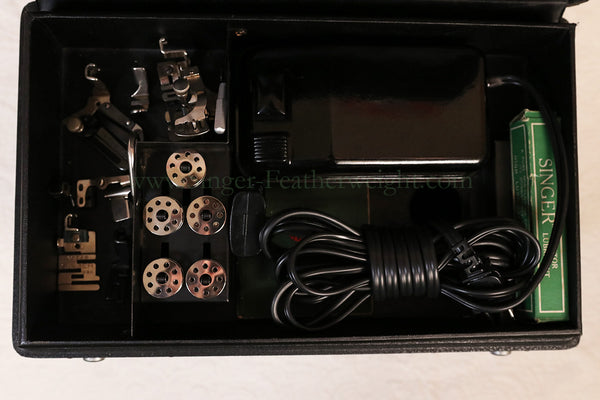
If the attachments box is present, you will need to put either the box or the foot controller down inside the case and resting on the machine. Both will not fit in the tray up top at the same time. When you put something on the machine bed, however, we recommend wrapping it first in a soft cloth. That being said, this should only be done for a short period of time*. Do not use bubble wrap or it will leave impressions on the surface of the machine.

If there is a side tray with your case, then there will also be a metal bracket in the lid of your case to hold the foot controller. Below are a couple of photos showing how to insert the controller.
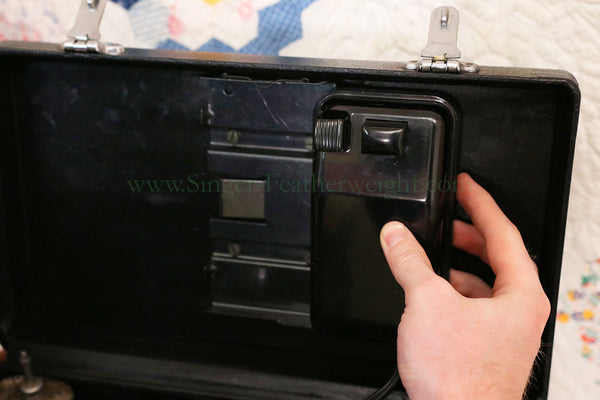
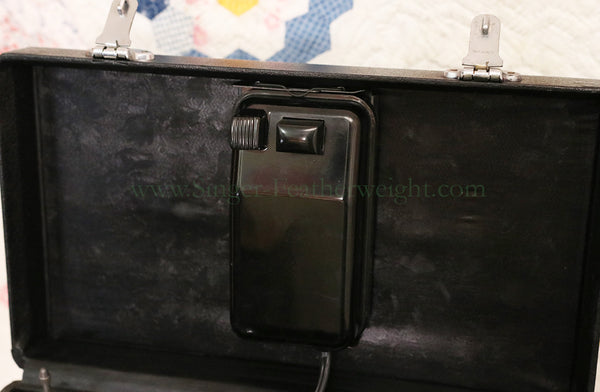
The foot controller will be inserted from the right side and gently pressed toward the left side.
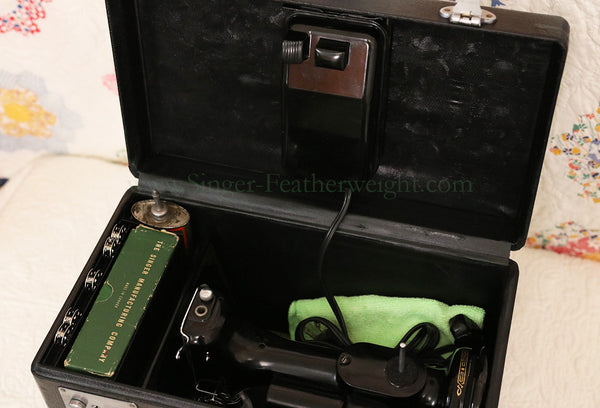
A soft cloth should be wrapped around the cord to protect the machine from the plugs.
#7 Closing the Case
Once everything has been packed up, slowly close the lid making sure that nothing is getting caught around the edge of the lid. The clasps will fold down and snap in place into the latches. Now your Featherweight is all set for the next time you need to sew!
A Few Tips on Storing the Machine
We often get questions about storing the machine... Should the presser foot be down? Should the needle be in place? Should I leave anything on the bed?
Our recommendation for storing the machine for a while is to do it with the presser foot in the down position, but with the presser foot removed. This will release the pressure on the springs, and it will keep the foot off the feed dogs.
The needle can be left in or out, but the machine should be unthreaded. Otherwise, moisture can collect in the thread fibers, and certain springs have tension on them when the machine is threaded. The bobbin case should also not have a bobbin in it.
*Absolutely nothing should be left on the bed for an extended period of time. Fabric is okay for a little while, but over time almost any material can leave thread grain impressions in the clearcoat. If the foot controller or attachments box does not fit in the tray of the case, it is best to store it outside the case.
White Featherweight Cases are much different than all other Featherweights cases because they do not have convenient compartments or brackets where all the accessories can be put. To keep your White Featherweight accessories tidy it is probably best to sew a handy bag that they can fit in.
Packing Up the Type #1 1933 Case
For Featherweight owners that are lucky enough to have a 1933 Featherweight with its original type #1 case, packing up all the accessories will look a little bit different.
You will notice that the oil can goes in the same way as the other top tray cases, but the manual will not fit in the top tray for the type #1 case. We recommend slipping the manual just behind the oil can or its bracket; this will keep the manual from getting bent.
With this top tray the attachments, screwdrivers and bobbins, whether in the green attachments box or out of the box will fit conveniently in the center compartment.
Finally, when the metal foot controller is inserted, it will hang on the bracket at the right side of the top tray. The cords will come around on top of the tray, and when they are wrapped up, they will fit down inside the left compartment of the tray.
We hope that this post will help you keep your Featherweight case and accessories nice and tidy.
Feel free to comment if you have any questions about packing up and storing the machine.