
Capacitors - Why Did My Featherweight Start Sewing By Itself All of the Sudden?
Many Featherweight owners have asked, "what are these silver cylinders inside my foot controller?" For several of the Featherweights manufactured in the UK, capacitors were added inside the foot controller, motor, or the machine itself. The purpose of capacitors was to cut down on electrical feedback with old TVs and radios. We no longer have this problem with present-day electricity, and nowadays the capacitors end up being quite the nuisance, if not potentially dangerous.
We often get contacted by frightened customers exclaiming that their machine just started sewing all of the sudden without the foot controller being depressed at all. The cause? Those capacitors! In this tutorial you will learn where and how to locate the capacitor(s), as well as how to remove them. Capacitors were only issued with the Featherweights that were manufactured in the UK, so if you have a US-made Featherweight, you will not need to worry about removing them.
Capacitors inside the foot controller:
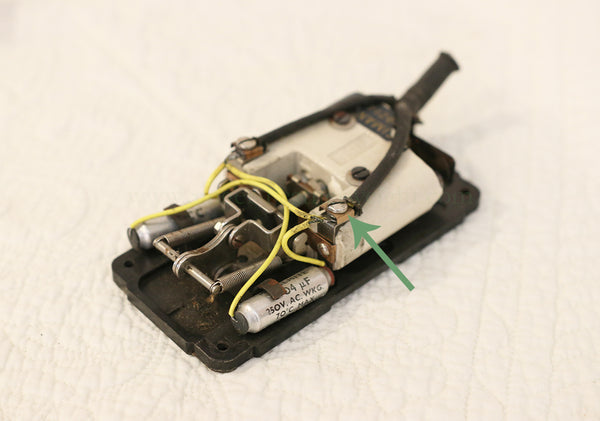
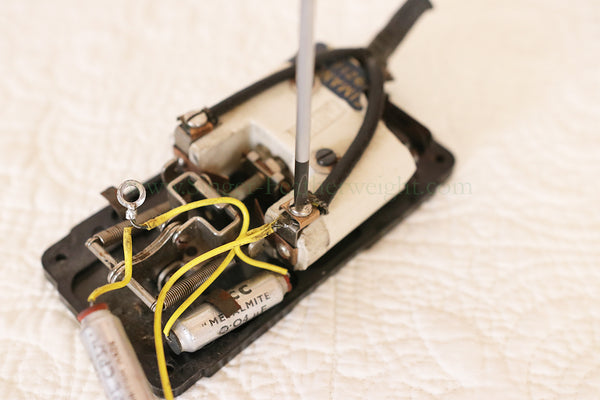
In the above photo you will see the capacitors connected to the controller by yellow wires. Capacitors inside the controller are by far the most common location and occurrence of capacitors. The yellow wires are connected to the controller by the screws indicated by the green arrow. By removing these screws, the capacitors can easily be removed and discarded. After you have removed them, simply reinstall the screws to their original location.
Capacitors Inside the Machine:
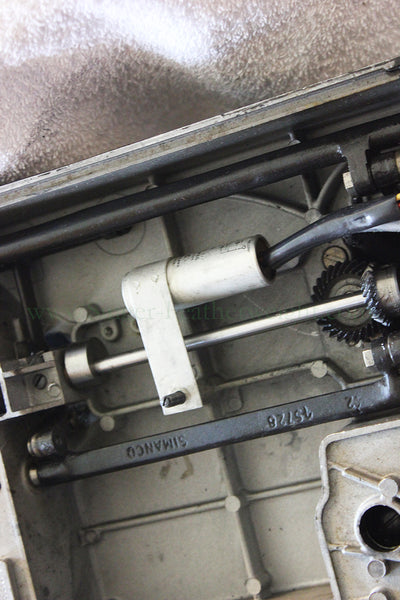
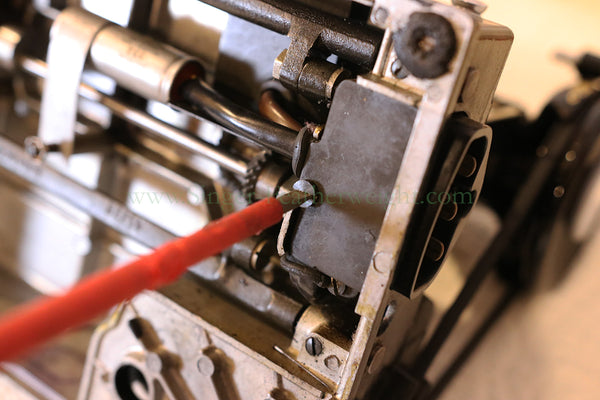
Capacitors found in some 221Ks in the 1940s and 1950s are much larger than the ones inside the controller, and they are not near as common. They do need to be removed, however, and this can be done by loosening the nut that holds the capacitor cylinder onto the drip pan screw (see photo below). From there you will need to disconnect the wires at the terminal. Here is a link to our tutorial on replacing the electrical components; this will be a good reference point for dealing with those wires.
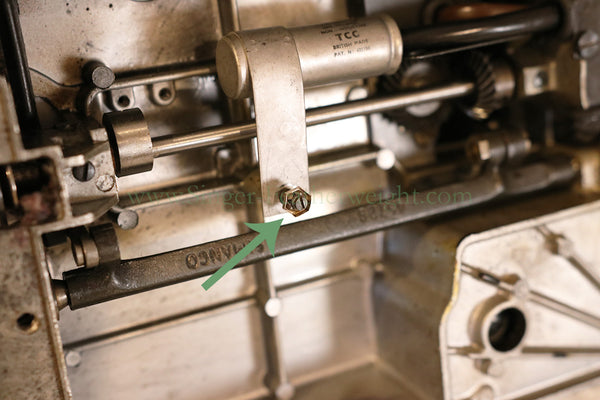
Here is the retaining nut holding the capacitor onto the drip pan post screw.
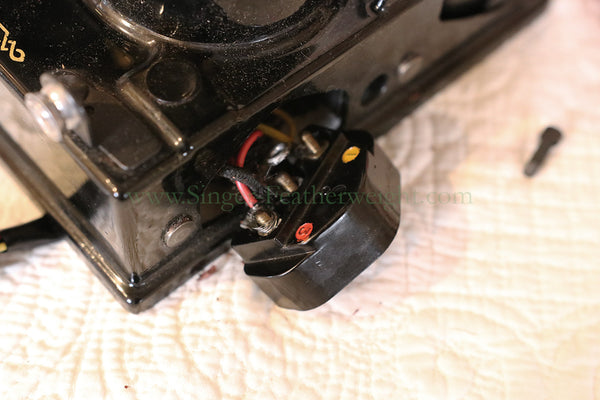
Once the capacitor has been removed from the drip pan post you can remove the wire cover at the terminal. The wire cover is held on by two screws.

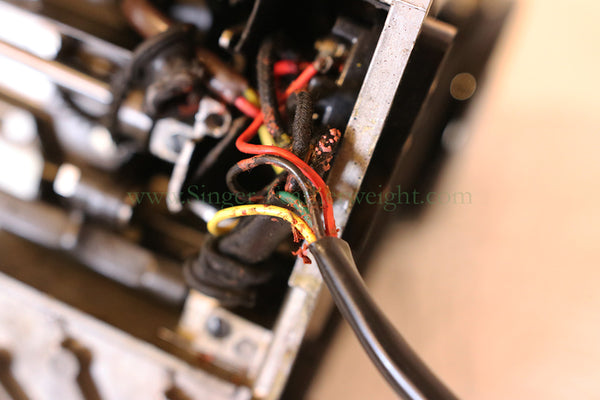
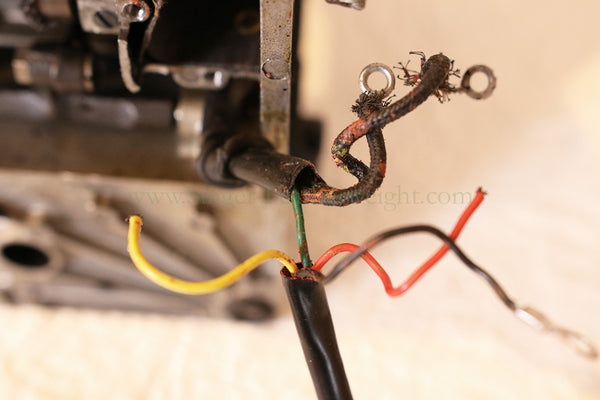
You can see here how there are a total of four wires coming from the capacitor. Three are hooked up to the the back of the terminal receptacle, and one is connected to the motor.
With the terminal receptacle removed, you will be able to see and disconnect the red, black, and yellow wires that are coming from the capacitor.
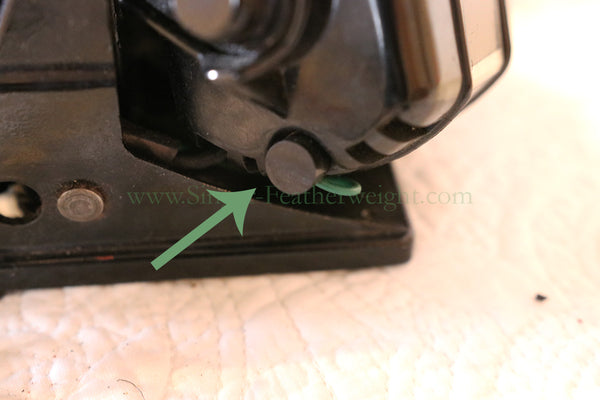
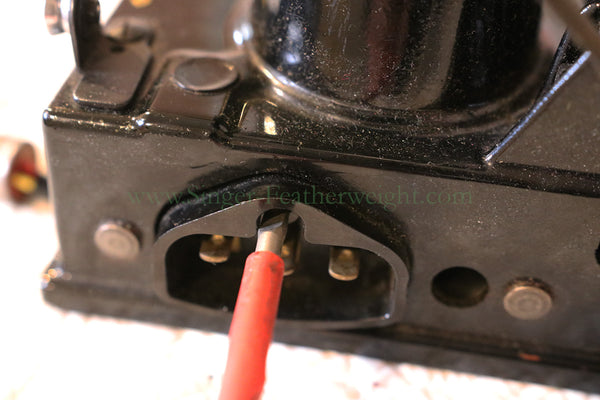
The green wire can be followed to a small plug on the side of the motor. The plug can simply be pulled out, and then the green wire will be exposed.
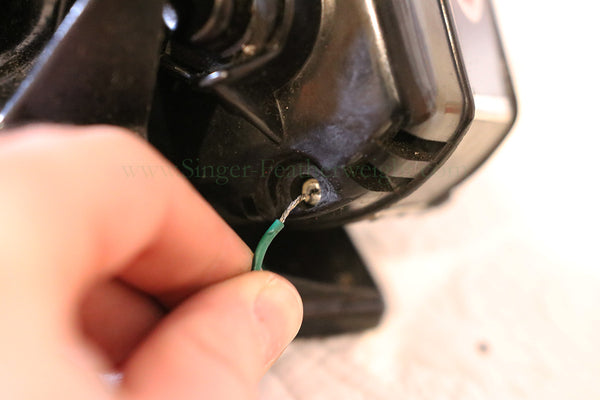
The final step will be tugging on the green wire to remove it from the motor.
Capacitors Inside the Motor:
Below you will find step-by-step photos showing how to take the capacitors out of the motor. The motor will need to be taken apart to do this, but capacitors in the motor are quite uncommon. A special thank you to Heidi C. for providing us with this wonderful demonstration. Not only did she provide these great illustrated photos, but keep scrolling and you'll find a video tutorial featuring her instructions as well. Enjoy!
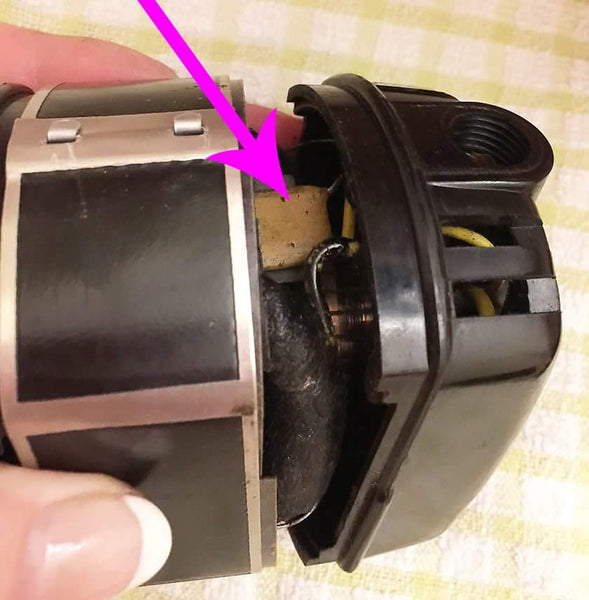
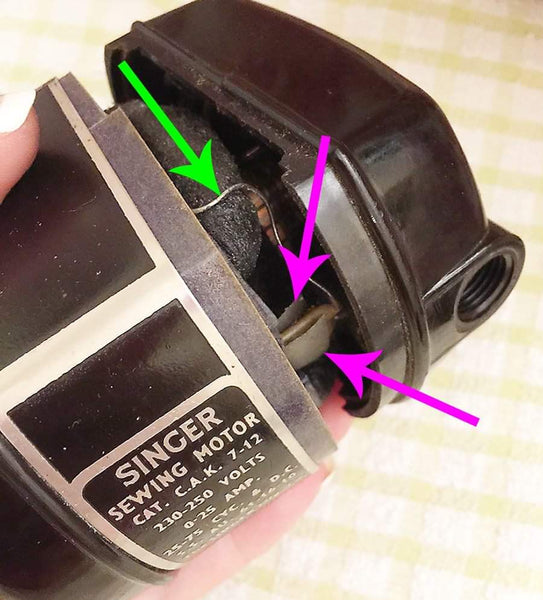
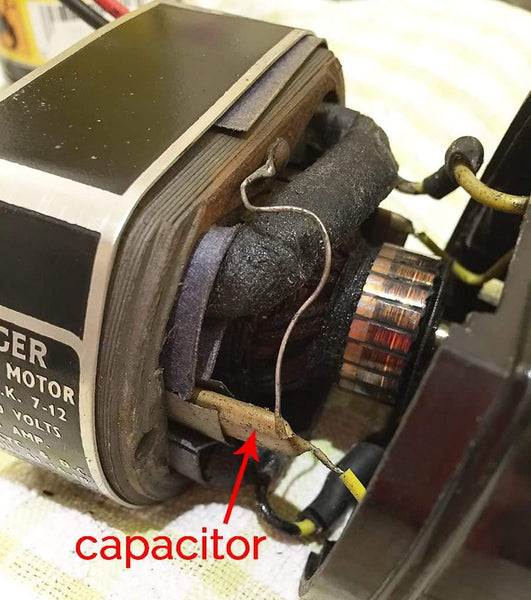
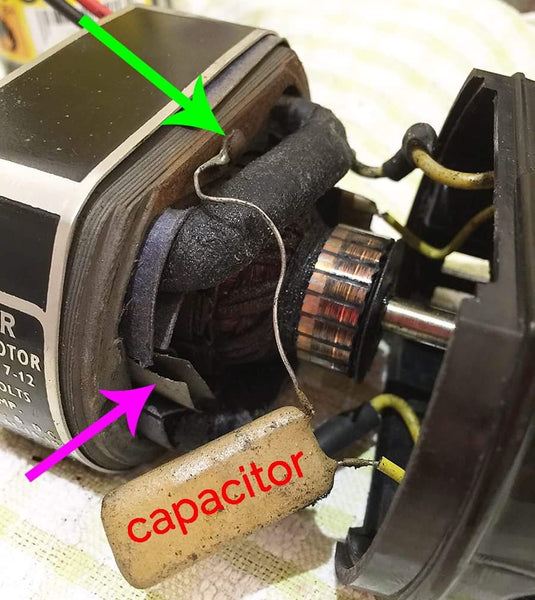
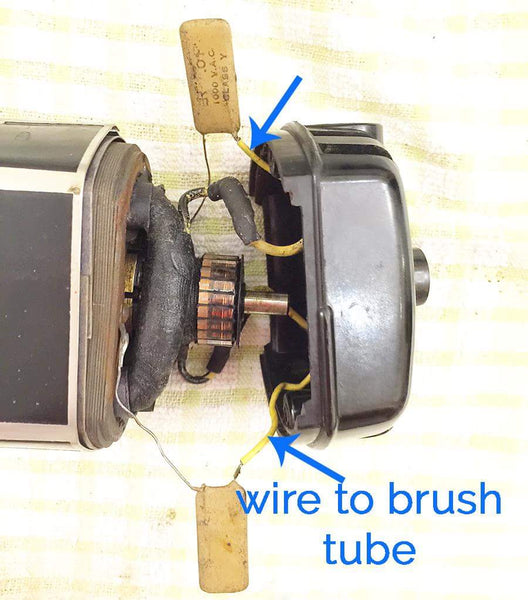

Once you locate the starting points of the capacitor wires, you will need to cut them as close as possible with wire cutters.
To help with motor capacitor removal (because it can be quite a delicate procedure), Heidi was incredibly gracious to share her video with us below! This was so well done we wanted to pass it on and share with the rest of the Featherweight community, too! We think you will find this video incredibly helpful with her step-by-step detailed instructions as she walks you through the motor capacitor removal process, but we also believe you will rightly enjoy her lovely accent as well.
(It's always a treat when Heidi telephones us... we could listen to her talk all day long!)
We hope Heidi's tutorial was helpful! Capacitors can definitely cause trouble inside your 221K and 222K, and they need to be removed if your machine has them.
On that note, to determine where your machine was made, refer to the dating chart, referencing the 2-letter prefix section of the chart for manufacturer location. If your machine isn't causing problems and you want to look for a capacitor, begin by looking in the foot controller and underneath the machine. The motor, however, presents a challenge. Because the wiring inside the motors is so delicate, we don't recommend motor exploration unless a problem arises or if the symptom of the machine running on its own presents itself.
Please contact us if you have any odd electrical marvels with your Featherweight, or if you need assistance removing the capacitors. You may also post photos or questions in the comments below because it helps others learning, too!