Taxes and discounts calculated in checkout.
BROWSE NEWS
Featherweight Case Restore Along: Part 24, 25, 26 & 27 - The Final Steps
Welcome back to the Singer Featherweight Case Restore Along! If you are just joining us, you can catch up on Part 22 & 23 of the Case Restore Along right HERE! Earlier this year, we crossed paths with Annette on our Singer Featherweight 221 & 222 Facebook Group, showcasing one of her beautiful Featherweight Case Restorations. She was kind enough to create a very informative journey of her restorative process and we hope you enjoy following along! In today's installment, Annette shows us how to finish the interior and create pockets for the lid of the Singer Featherweight case. Products Used in Today's Restore Along: OdiCoat® Waterproof Glue Gel...
Featherweight Case Restore Along: Part 22 & 23 - Create & Apply Bottom Template
Welcome back to the Singer Featherweight Case Restore Along! If you are just joining us, you can catch up on Part 19, 20 & 21 of the Case Restore Along right HERE! Earlier this year, we crossed paths with Annette on our Singer Featherweight 221 & 222 Facebook Group, showcasing one of her beautiful Featherweight Case Restorations. She was kind enough to create a very informative journey of her restorative process and we hope you enjoy following along! In today's installment, Annette shows us how to create and apply the template to the bottom of the Singer Featherweight case. Products Used in Today's Restore Along: Cutting Ruler, Singer...
Featherweight Case Restore Along: Part 19, 20 & 21 - Installing Slip Pockets
elcome back to the Singer Featherweight Case Restore Along! If you are just joining us, you can catch up on Part 17 & 18 of the Case Restore Along right HERE! Earlier this year, we crossed paths with Annette on our Singer Featherweight 221 & 222 Facebook Group, showcasing one of her beautiful Featherweight Case Restorations. She was kind enough to create a very informative journey of her restorative process and we hope you enjoy following along! In today's installment, Annette shows us how to create and install slip pockets to the interior of the Singer Featherweight case! Products Used in Today's Restore Along: Cutting Ruler, Singer Featherweight...
Featherweight Case Restore Along: Part 17 & 18 - Installing Case Handles
Welcome back to the Singer Featherweight Case Restore Along! If you are just joining us, you can catch up on Part 15 & 16 of the Case Restore Along right HERE! Earlier this year, we crossed paths with Annette on our Singer Featherweight 221 & 222 Facebook Group, showcasing one of her beautiful Featherweight Case Restorations. She was kind enough to create a very informative journey of her restorative process and we hope you enjoy following along! In today's installment, Annette shows us how to apply leather to the case handle and then how to reattach the handles to the lid! Products Used in Today's Restore Along: 1/2”...
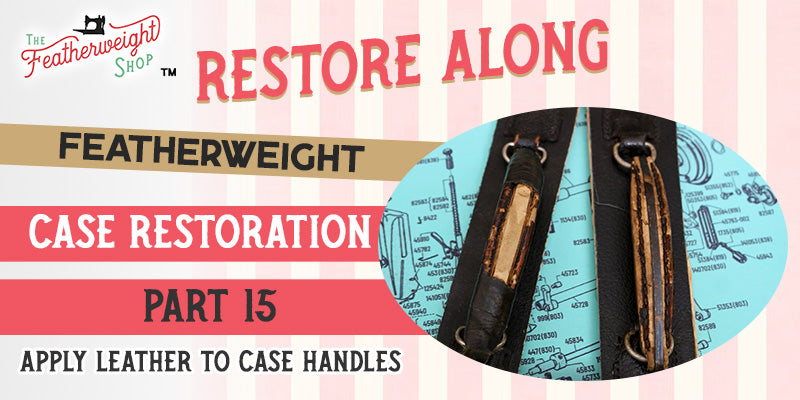
Featherweight Case Restore Along: Part 15 & 16 - Apply Leather to the Case Handles
Welcome back to the Singer Featherweight Case Restore Along! If you are just joining us, you can catch up on Part 14 of the Case Restore Along right HERE! Earlier this year, we crossed paths with Annette on our Singer Featherweight 221 & 222 Facebook Group, showcasing one of her beautiful Featherweight Case Restorations. She was kind enough to create a very informative journey of her restorative process and we hope you enjoy following along! In today's installment, Annette shows us how to apply leather to the case handle and then how to reattach the handles to the lid! Products Used in Today's Restore Along: Scissors...
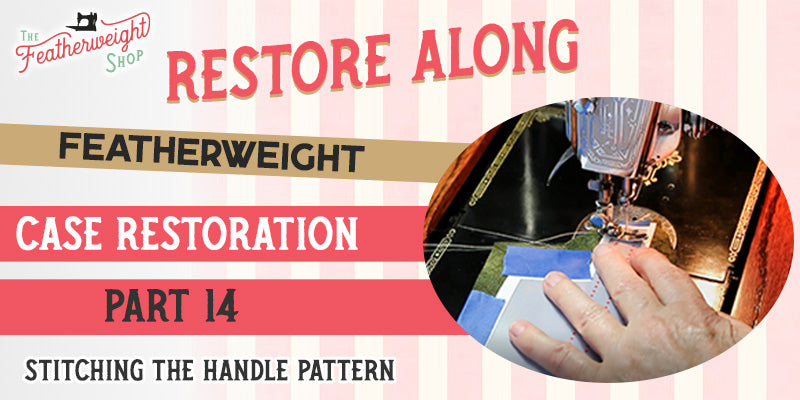
Featherweight Case Restore Along Part 14: Stitching the Handle Pattern
Welcome back to the Singer Featherweight Case Restore Along! If you are just joining us, you can catch up on Part 12 & 13 of the Case Restore Along right HERE! Earlier this year, we crossed paths with Annette on our Singer Featherweight 221 & 222 Facebook Group, showcasing one of her beautiful Featherweight Case Restorations. She was kind enough to create a very informative journey of her restorative process and we hope you enjoy following along! In today's installment, Annette shows us how to stitch the handle pattern cover on her Singer Featherweight! Products Used in Today's Restore Along: Scissors Thread-O-Stat Paper Case Handle Pattern (click...
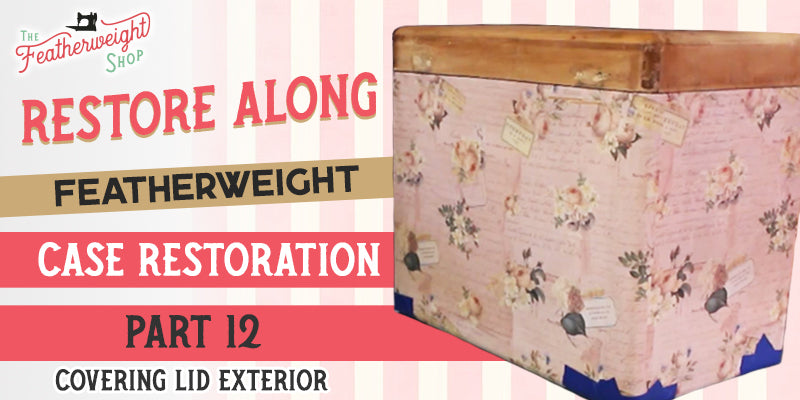
Featherweight Case Restore Along: Part 12 & 13 - Covering the Top of the Case Lid in Fabric
Welcome back to the Singer Featherweight Case Restore Along! If you are just joining us, you can catch up on Part 10 & 11 of the Case Restore Along right HERE! Earlier this year, we crossed paths with Annette on our Singer Featherweight 221 & 222 Facebook Group, showcasing one of her beautiful Featherweight Case Restorations. She was kind enough to create a very informative journey of her restorative process and we hope you enjoy following along! In today's installment, Annette shows us how she covers the top of the Featherweight case lid in fabric! Products Used in Today's Restore Along: Aleene’s Tacky Glue Cup to hold...
Featherweight Case Restore Along Part 10 & 11: Covering the Top & Bottom Box Edges
Welcome back to the Singer Featherweight Case Restore Along! If you are just joining us, you can catch up on Part 7, 8 & 9 of the Case Restore Along right HERE! Earlier this year, we crossed paths with Annette on our Singer Featherweight 221 & 222 Facebook Group, showcasing one of her beautiful Featherweight Case Restorations. She was kind enough to create a very informative journey of her restorative process and we hope you enjoy following along! In today's installment, Annette shows us how she covers the top and bottom edges of the Singer Featherweight Case! Products Used in Today's Restore Along: Aleene’s Tacky Glue Cup...
Featherweight Case Restore Along Part 7, 8, & 9: Covering the Outside of the Case
Welcome back to the Singer Featherweight Case Restore Along! If you are just joining us, you can catch up on Part 5 & 6 of the Case Restore Along right HERE! Earlier this year, we crossed paths with Annette on our Singer Featherweight 221 & 222 Facebook Group, showcasing one of her beautiful Featherweight Case Restorations. She was kind enough to create a very informative journey of her restorative process and we hope you enjoy following along! In the last installment, Annette showed us how to properly waterproof our fabric prior to today's lesson on covering the exterior of the case! Products Used in Today's Restore Along:1.Aleene's...
Featherweight Case Restore Along Part 5 & 6: Preparing & Waterproofing the Fabric
Part 5, Preparing the Fabric and Part 6, Waterproofing the Fabric Welcome back to the Singer Featherweight Case Restore Along! If you are just joining us, you can catch up on Part 4 of the Case Restore Along right HERE! Earlier this year, we crossed paths with Annette on our Singer Featherweight 221 & 222 Facebook Group, showcasing one of her beautiful Featherweight Case Restorations. She was kind enough to create a very informative journey of her restorative process and we hope you enjoy following along! In the last installment, Annette showed us how to clean the hardware on the Featherweight case! This month, we are focusing on preparing...
Featherweight Case Restore Along Part 4: Cleaning Case Hardware
Welcome back to the Singer Featherweight Case Restore Along! If you are just joining us, you can catch up on Part 3 of the Case Restore Along right HERE! Earlier this year, we crossed paths with Annette on our Singer Featherweight 221 & 222 Facebook Group, showcasing one of her beautiful Featherweight Case Restorations. She was kind enough to create a very informative journey of her restorative process and we hope you enjoy following along! In the last installment, Annette showed us how to remove the inner hardware on a Singer Featherweight case she is fully restoring! This month, she is focusing on cleaning the hardware parts...
Featherweight Case Restore Along Part 3: Featherweight Case Inner Hardware Removal
Welcome back to the Singer Featherweight Case Restore Along! If you are just joining us, you can catch up on Part 2 of the Case Restore Along right HERE! Earlier this year, we crossed paths with Annette on our Singer Featherweight 221 & 222 Facebook Group, showcasing one of her beautiful Featherweight Case Restorations. She was kind enough to create a very informative journey of her restorative process and we hope you enjoy following along! In the last installment, Annette showed us how to remove the exterior hardware on the Featherweight case! This month, we are focusing on the interior hardware removal process!Products Used in Today's Restore...
Featherweight Case Restore Along Part 2: Featherweight Case Outer Hardware Removal
Welcome back to the Singer Featherweight Case Restore Along! If you are just joining us, you can catch up on Part 1 of the Case Restore Along right HERE! Earlier this year, we crossed paths with Annette on our Singer Featherweight 221 & 222 Facebook Group, showcasing one of her beautiful Featherweight Case Restorations. She was kind enough to create a very informative journey of her restorative process and we hope you enjoy following along! Now that the Featherweight case is completely stripped down of all the old tolex, and sanded to a smooth finish, we are moving on to the next step by removing...
Featherweight Case Restore Along Part 1: Welcome to the Restoration!
Welcome to Part 1 of the Featherweight Case Restore Along! Today, Annette walks us through removing the old tolex, as well as what the finished product looks like! Earlier this year, we were overjoyed to cross paths with delightful Annette on our Singer Featherweight 221 & 222 Facebook Group, showcasing one of her beautiful Featherweight Case Restorations. We invited her to participate in a Restore Along series. She was kind enough to create a very informative journey of her restorative process. This will be so enjoyable to follow along!Products Used in Today's Case Restoration Part 1: White Vinegar Tray for White Vinegar Putty Knife Razor Knife Microfiber Cloth...
Restore Along Part 32: Getting Ready To Paint Tulip!
Thank you for joining us on Tulip's journey! Due to unforeseen circumstances we are needing to pause this machine restore along of Julia's restoration of Tulip.The Restore Along is back, and so is Julia, along with her Featherweights Tulip and Jill. Last time, Julia successfully finished painting Jill with every coat required for the Soul Red Metallic look. Catch up on her previous work here in Restore Along Part 31! Now, it’s time to examine the results! Julia removes the paint blockers from Jill to see how effective they were and finds three places where the paint stuck. The bare cardboard on...
Restore Along Part 31
Welcome back to the Restore Along with Julia and Tulip. Previously, Julia has applied one full set of practice coats of paint to Jill, the Featherweight donated to her for practice purposes. After assessing the results, she stripped all the paint off Jill and reset for another round. You can catch up on the journey so far here by catching up on last week's installment here: Previous Week Restore Along: Part 30 With the coats of primer applied and dried, the time for applying color is here. One reason Julia is thoroughly practicing her painting skills is the learning curve...
Restore Along Part 30
Welcome back to the Restore along with Julia and Tulip (and Jill)! Last week, Julia was on round two of her painting practice, giving a fresh coat of primer to Jill. Find out what issues came about in last week’s installment here: Restore Along Part 29 Today’s work begins with a gentle sanding of Jill’s first coat of primer as preparation for a successful, even second coat. Using wet 600 grit sandpaper, Julia folds the sandpaper around a q-tip for a little extra padding and rubs lightly in one direction (not circles). During this sanding process, Julia develops a creative...
Restore Along Part 29
Welcome back to the Restore Along with Julia! Last week, Julia continued to work on Jill, stripping the first red coat of paint in preparation for another practice run. To catch up on the progress so far, read last week’s installment here: Previous Restore Along: Part 28 Julia starts by inspecting the past day's work with her magnification lens headset. Sure enough, there are still minute specks of paint to remove. Julia spends the next two hours removing every particle she can find, in addition to applying liquid latex where needed. At last, Julia is ready for her second round...
Restore Along Part 28
Welcome back to the Restore Along with Julia! of Tulip. Before attempting to repaint Tulip, Julia has been working diligently with Jill, her practice machine, learning how to properly strip, prep, and paint. Last week, Julia completed her first test coat of Soul Red Metallic paint on Jill. It was a learning experience! Previous Post: Restore Along Part 27 Julia intends to get at least one more round of painting practice out of Jill, so she must make sure to get every last bit of red paint off, as well as re-mask the machine where needed. While finishing the paint stripping,...
Restore Along Part 27
Welcome back to the Restore Along with Julia and Tulip. After months of hard work, today is the day Julia will practice applying the layers of Soul Red Metallic paint to Jill, the machine she has been gifted as a way to practice her technique. If you’ve missed any, you can catch up on previous installments below. Previous Post: Restore Along Part 26: Time to Paint! Jill has already been primed, and now Julia dives right in, excited to see the first coat of red on her practice Featherweight. The first coat goes on fast. A little too fast! Julia's sprayer...
- Page 1 of 3
- Next » Next page