NOTE: This tutorial is for the Singer Featherweight 221 model in original black, white or tan. It will work for the Featherweight 222 as well, but the throat plate on a 222 is made of steel, so this technique will rarely be necessary. Products and Tools Referenced: Thumb Screw (Vintage) Thumb Screw (New) Throat / Needle Plate (Vintage) Throat / Needle Plate (New with Measuring Lines) Amoeba Embroidery & Darning Plate & Screw Buttonholer Feed Cover Plate & Screw Underbraider Featherweight Accurate Seam Guide Kerosene (Empty Oil Bottle works great for this) Drip Pan Tray Felt Drip Pad Presser Bar Presser Foot (Vintage)...
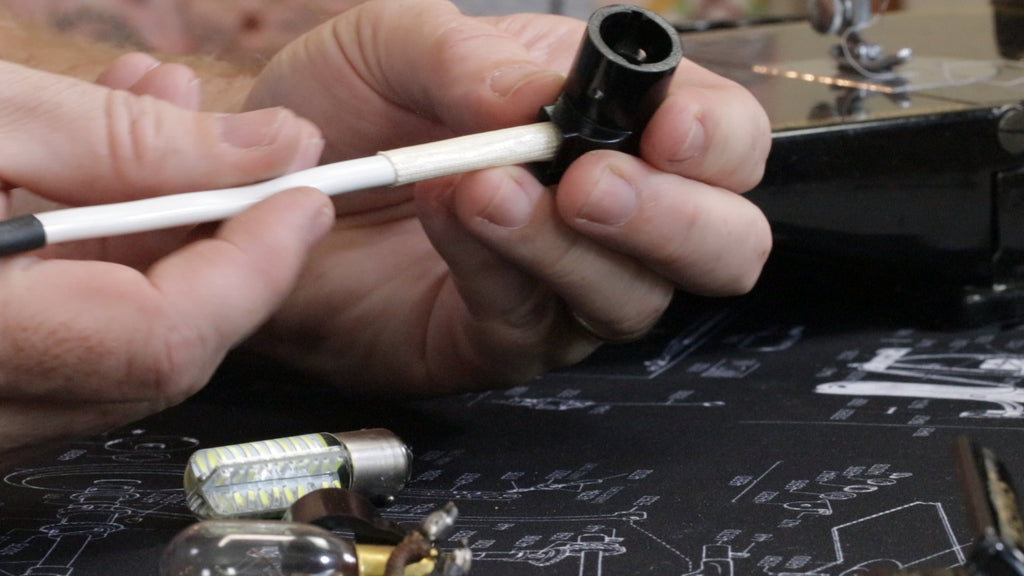
Featherweight Light Wiring Tutorial Series - Part 3 of 3 In Part 2 of the Light Wiring Series, we examined the light wires and followed a step-by-step process for repair. Today, in our final installment of the Light Wiring Series, we will discuss the causes as well as how to fix a faulty or flickering light bulb on a Singer Featherweight. Remember, this series is only for Singer Featherweight 221 machines manufactured in the US from 1933 to 1957 and for 221 Featherweight machines manufactured in the UK from 1947 to about 1951. Tools Needed or Recommended: Gloves Safety Glasses Wera...
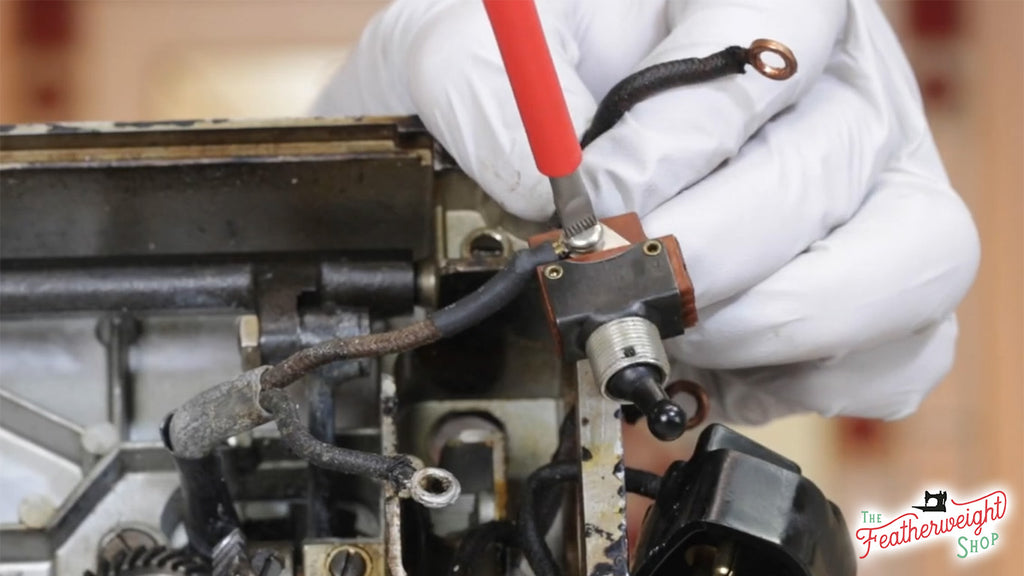
Featherweight Light Wiring Tutorial Series - Part 2 In Part 1 of the Light Wiring Series, we did a basic cleaning of the light wiring lead sheath underneath the machine, which helps to remove some of the exposed oxidation residue that can build up over a long period of time. Remember, this series is only for Singer Featherweight 221 machines manufactured in the US from 1933 to 1957 and for 221 Featherweight machines manufactured in the UK from 1947 to about 1951 . On the topic of oxidation, sometimes that residue, or corrosion, is not just on the area seen underneath...
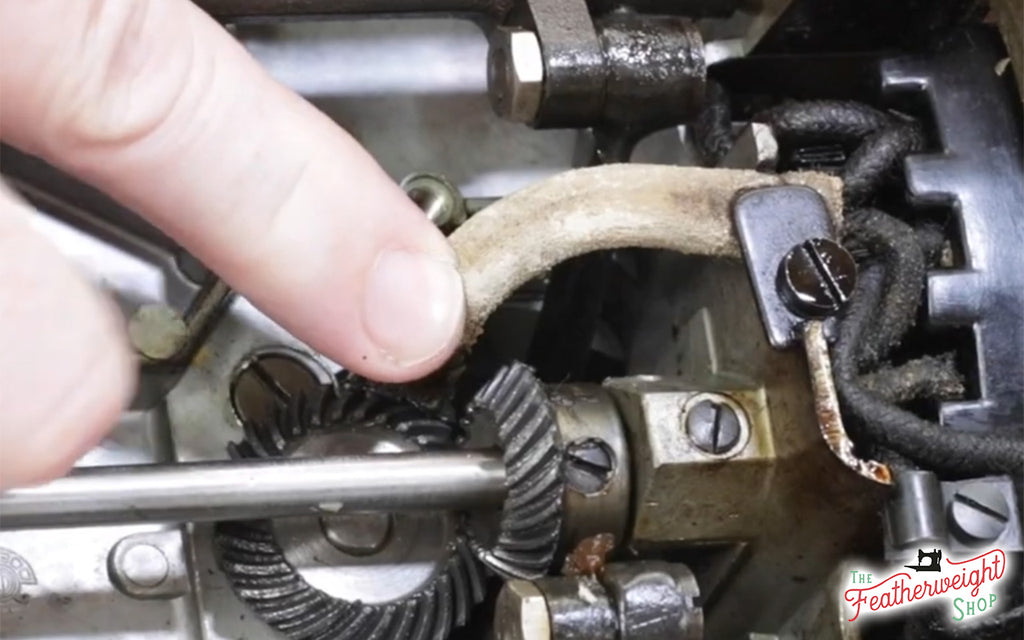
Part 1: A Tutorial on Cleaning the Lead Sheath on a Singer Featherweight 221. Products & Tools Referenced: Light Socket with Sheath Wera Safety Screwdriver (also available in the Set of 4) Gear Cleaning Brush Low Odor Kerosene and Long-Spouted Bottle Sew Retro Grease Small Terry-Cloth Towel (for scrubbing) Felt Drip Pan Large Towel or Shop Rag (for collecting kerosene drips and old grease) Gloves Mask Eye-Protection The lead sheath on Singer Featherweight 221 models (1933-1957 for US-made Featherweights and 1947-1951 for UK-made Featherweights) covers the light wires and often requires careful cleaning and maintenance if there is any white oxidation present. In...
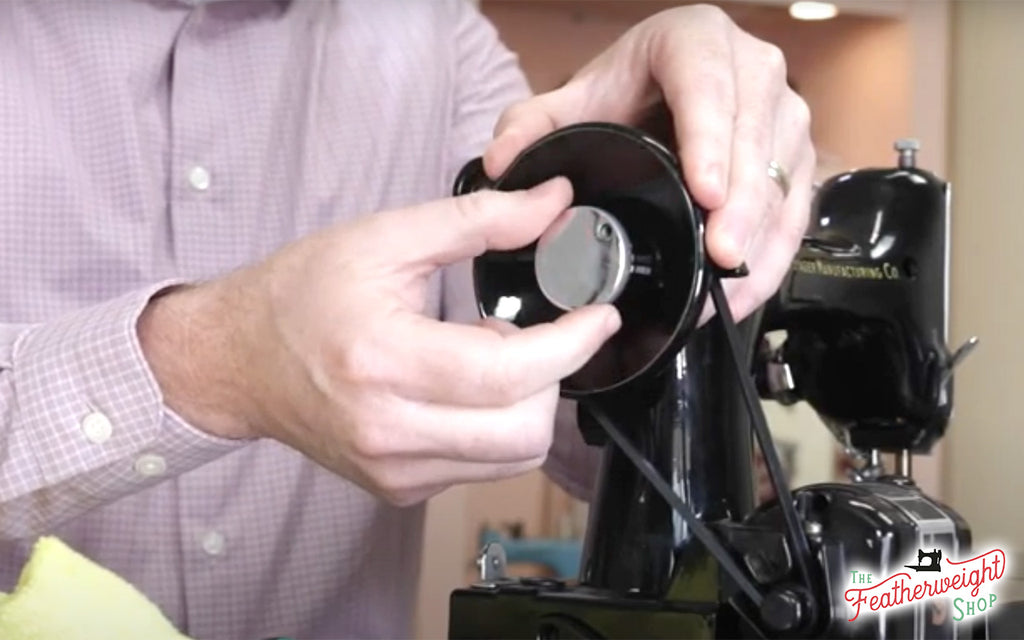
Do you have to hold the bobbin winder down in order to get it to wind? If so, then the washers around the bobbin winder screw either need replaced or turned around. Follow the video tutorial or step-by-step photo tutorial below to learn a few simple tips for servicing your Singer Featherweight Bobbin Winder. Relevant Parts and Products: Bobbin Winder Bobbin Winder Washer Bobbin Winder Screw Singer Featherweight Belt Bobbin Bobbin Tension Meter Bobbin Winder Tension Bracket Sewing Machine Oil Empty Oil Bottle (for easy use with kerosene) The cupped washer keeps consistent pressure on the bobbin winder arm, resulting in pressure...
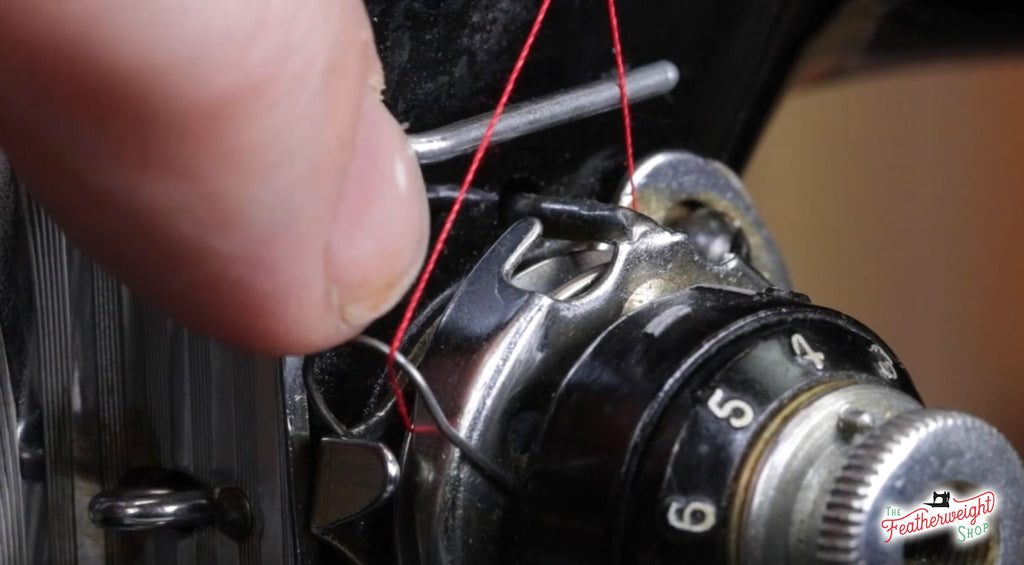
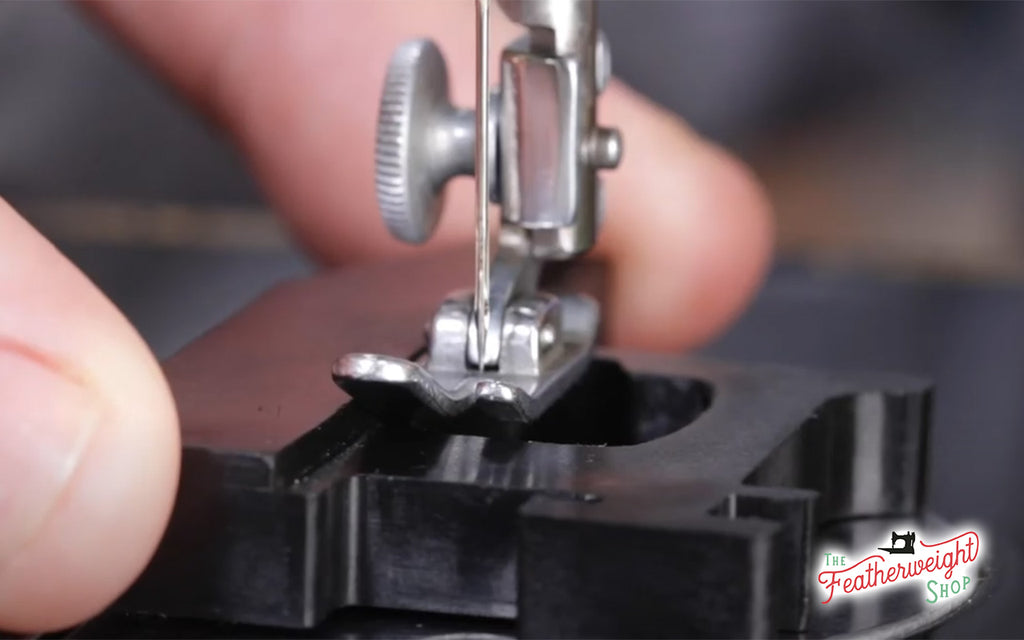
Learning to identify the thread path following a routine servicing and maintenance will help diagnose initial stitch tension inconsistencies and give confidence about learning to service a Singer Featherweight further. Parts Mentioned or Used: Tension Unit Tension Disks Upper Tension Take-Up Spring Upper Thread Guide Presser Foot Thread Post Here is a featherweight properly threaded: Comparatively, this threaded machine will have stitch troubles: At first glance, it may appear that they are threaded the same. But, as you can see when comparing the photos, the thread has missed the retaining fork in the threading process. Making a quick adjustment when threading the machine...
Is the presser foot misaligned? Is the fabric swimming or wandering under the presser foot? Are their skipped stitches when sewing over thick seams? Then this tutorial will help with troubleshooting these common problems. In a previous tutorial we showed how to properly adjust the actual pressure on the presser foot. Today we will discuss the proper height and position of the presser foot and how to set it accurately. Parts Discussed: Presser Foot Faceplate Screw Faceplate Presser Bar Presser Bar Clamp & Screw Pressure Knob Singer 221 Feed Dogs Throat Plate Presser Foot Gauge The pressure on the presser...
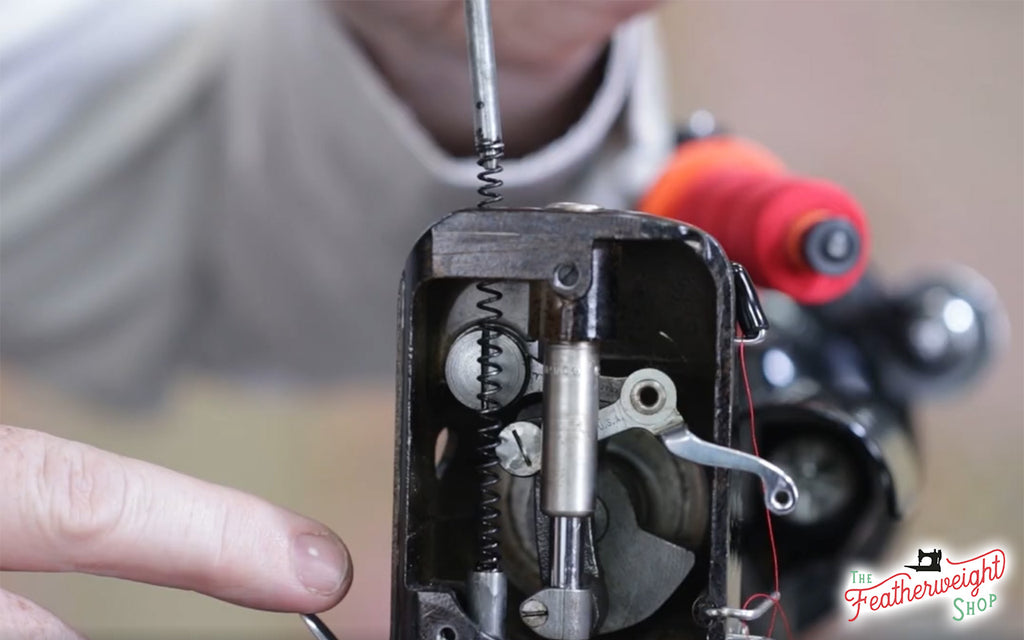
Today we are going to be addressing the presser foot pressure, or downward force on the presser foot. Parts Discussed: Presser Foot Presser Bar Presser Bar Spring Presser Bar & Spring (for white Featherweights only) Pressure Knob Singer 221 Feed Dogs Throat Plate Hook Assembly Featherweight Schematic Servicing Mat First, let’s talk about why the downward force on presser foot matters. When the presser foot is lowered and compressing the fabric, it needs a certain amount of pressure on it to both feed the fabric and assure that the thickness of the fabric is not stopping a stitch from forming. The...
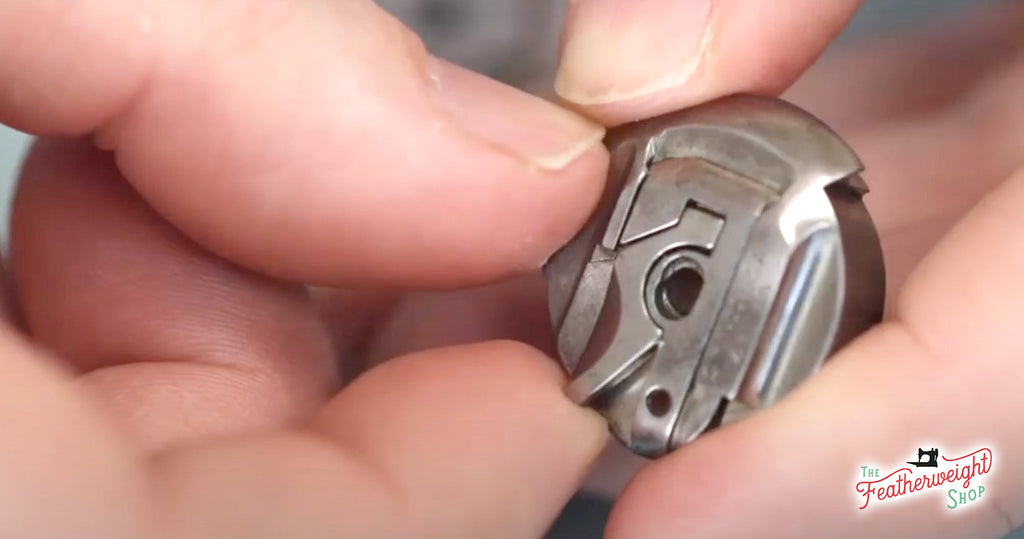
Follow along with the tutorial below to learn how to replace the Bobbin Case Latch on a Singer Featherweight 221 or 222. When does the Bobbin Case Latch need replaced or serviced? Replace the latch when it is actually broken. Service the latch when it will not spring back to its original position. To replace or service a Bobbin Case Latch, the latch will need removed. In order to remove it, access the latch screw on the inside of the bobbin case. The small Wera screwdriver works best for this, because the bobbin case latch screw is very tiny. Keep a magnetic...
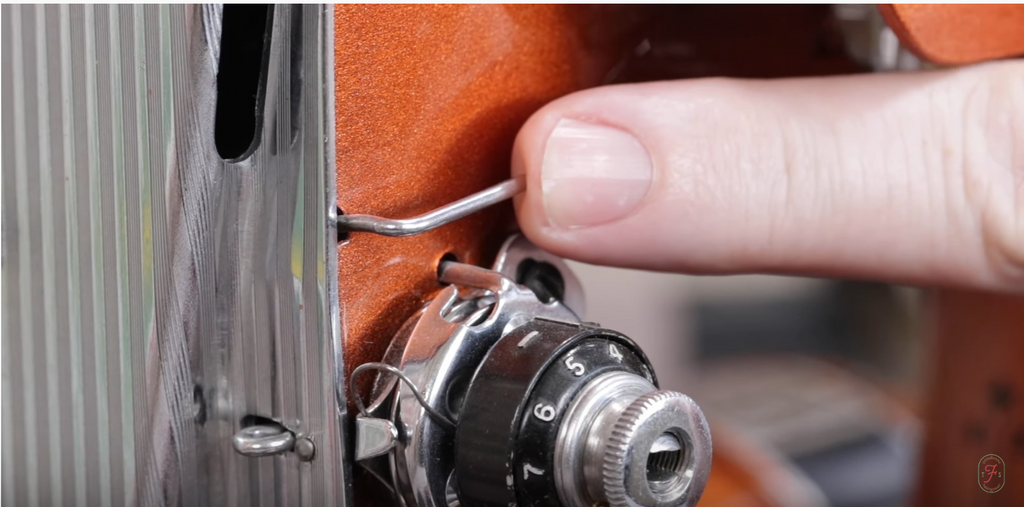
Today we are addressing a Stop Motion Knob that will not turn on your Singer Featherweight 221 or 222. Loosening the Stop Motion Knob is necessary to wind a bobbin, but being able to tighten it so that regular sewing can resume is just as important. There are two causes that prevent the Stop Motion Knob from functioning properly. Handwheel washer is positioned incorrectly. Stop-Motion Knob has been overtightened. Follow along with the video tutorial below as Carmon explains how the stop-motion knob works as well as troubleshooting these two common issues. Tools and Parts Related to Video: Wera Long Maintenance Screwdriver Stop-Motion Set...
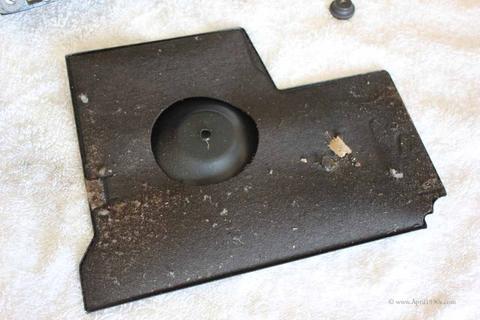
Today at The Featherweight Shop, Carmon and Ruthie will be showing you how to change the Felt Drip Pad on your Singer Featherweight properly! The felt drip pad that is underneath absorbs excess oil and, if heavily saturated, probably needs replacing. Not only will it take care of a simple routine maintenance for your machine, but it can also help eliminate some of the old musty odors that tend to collect from having been in storage for many years. Old Felt Drip Pad Felt Drip Pad Replacement Video Tutorial: Felt Drip Pad Replacement Tutorial Tools: 1. Putty Knife 2. Latex Gloves...
Welcome to The Featherweight Shop. In this tutorial, we are going to take you through the steps to replace the Thread Guide (as pictured below), which is located right above the tension unit. Thread Guide Featherweight Shop Thread Guide Replacement Video Tutorial At The Featherweight Shop, we commonly receive Featherweights that are badly damaged with corrosion or physical damage. Corrosion on Featherweight Physical damage on Featherweight Although these machines are severely damaged, they still have value in that they have usable parts on them. What we do is take the serviceable parts off of these Featherweights and use them on your Featherweights...
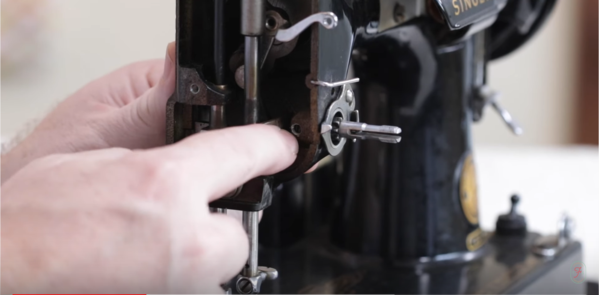
Learn how to properly remove the Tension Unit Post or stud in this step-by-step video tutorial by Carmon Henry from The Featherweight Shop. The transcript of the video tutorial, as well as all products needed to follow along are below. Please contact us with any questions or comments. Enjoy! There are a few reasons to remove the Tension Unit Post. These would include: performing a deep cleaning to the machine, preparing the machine for repainting, or if the Tension Unit has been damaged. The first step is to locate the set screw that is holding the tension unit stud in place. To do this,...