

Singer Featherweight
Schoolhouse
Categories
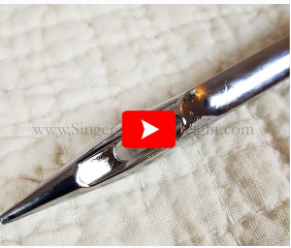
The Giant Schmetz Needle Tutorial
Using a giant needle as an example in the video far below, you will learn the various parts of a needle, as well as the importance of having a smoothly finished eye. One of our favorite needles to recommend is a Microtex Schmetz. They're sharp and they pierce exactly at the point of fabric ent...
Read More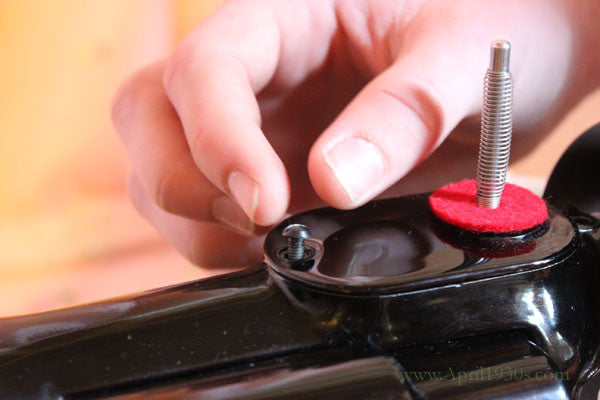
How to Loosen the Spool Pin Coverplate if the Screw is Too Tight
If your spool pin coverplate seems to be impossible to remove because of that stuck or stripped spool pin screw, this quick impromptu video might be just the trick to help you. Once you get your spool pin cover plate removed, be sure to not screw the screw back down too tightly -- just finger ti...
Read More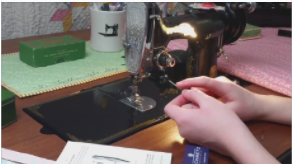
How To Properly Set the Needle (Getting To Know Your Featherweight, Part 3)
How To Properly Set The Needle Part 3 of the Getting To Know Your Singer Featherweight 221 series will show you how to properly set your Singer Featherweight needle. This tutorial by Ruthie will be especially helpful if you notice your machine having skipped stitches or even if your bobbin thre...
Read More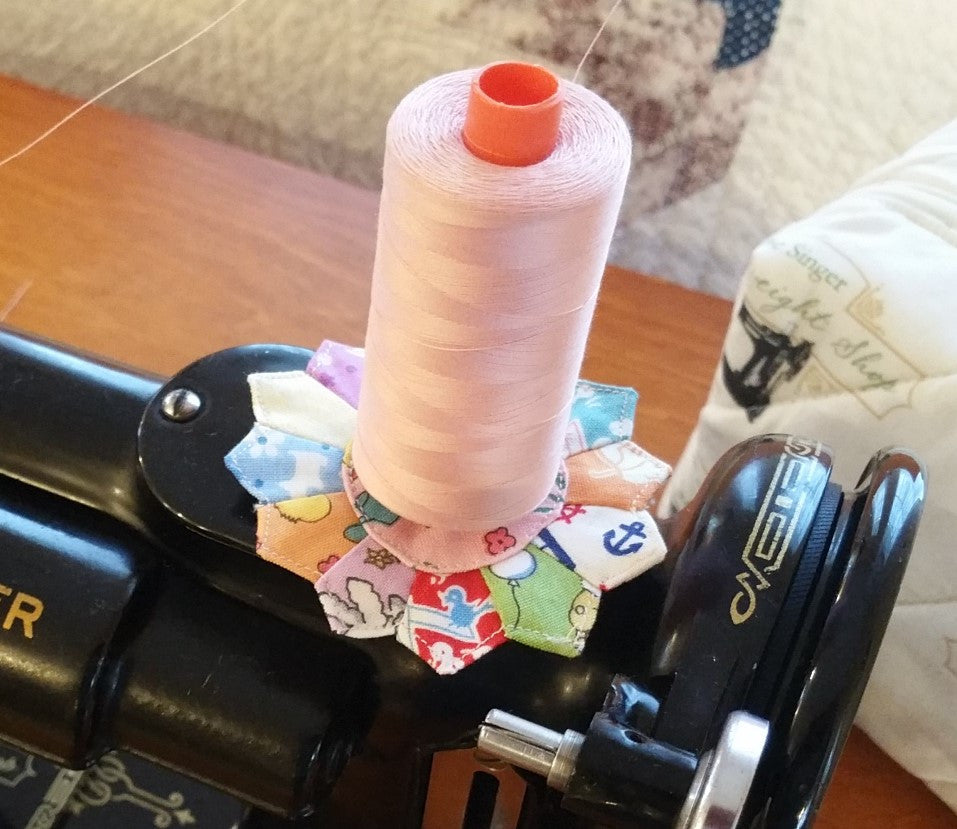
How Thread Affects Maintenance, Upper Tension & Bobbin Tension
Hello everyone, Carmon here. There has been a lot of discussion about thread brands the last couple of days on our Singer Featherweight 221 & 222K Sewing Machines Facebook group so I thought I would weigh in. As a teacher of Featherweight Maintenance Classes and Workshops, and the owner of T...
Read More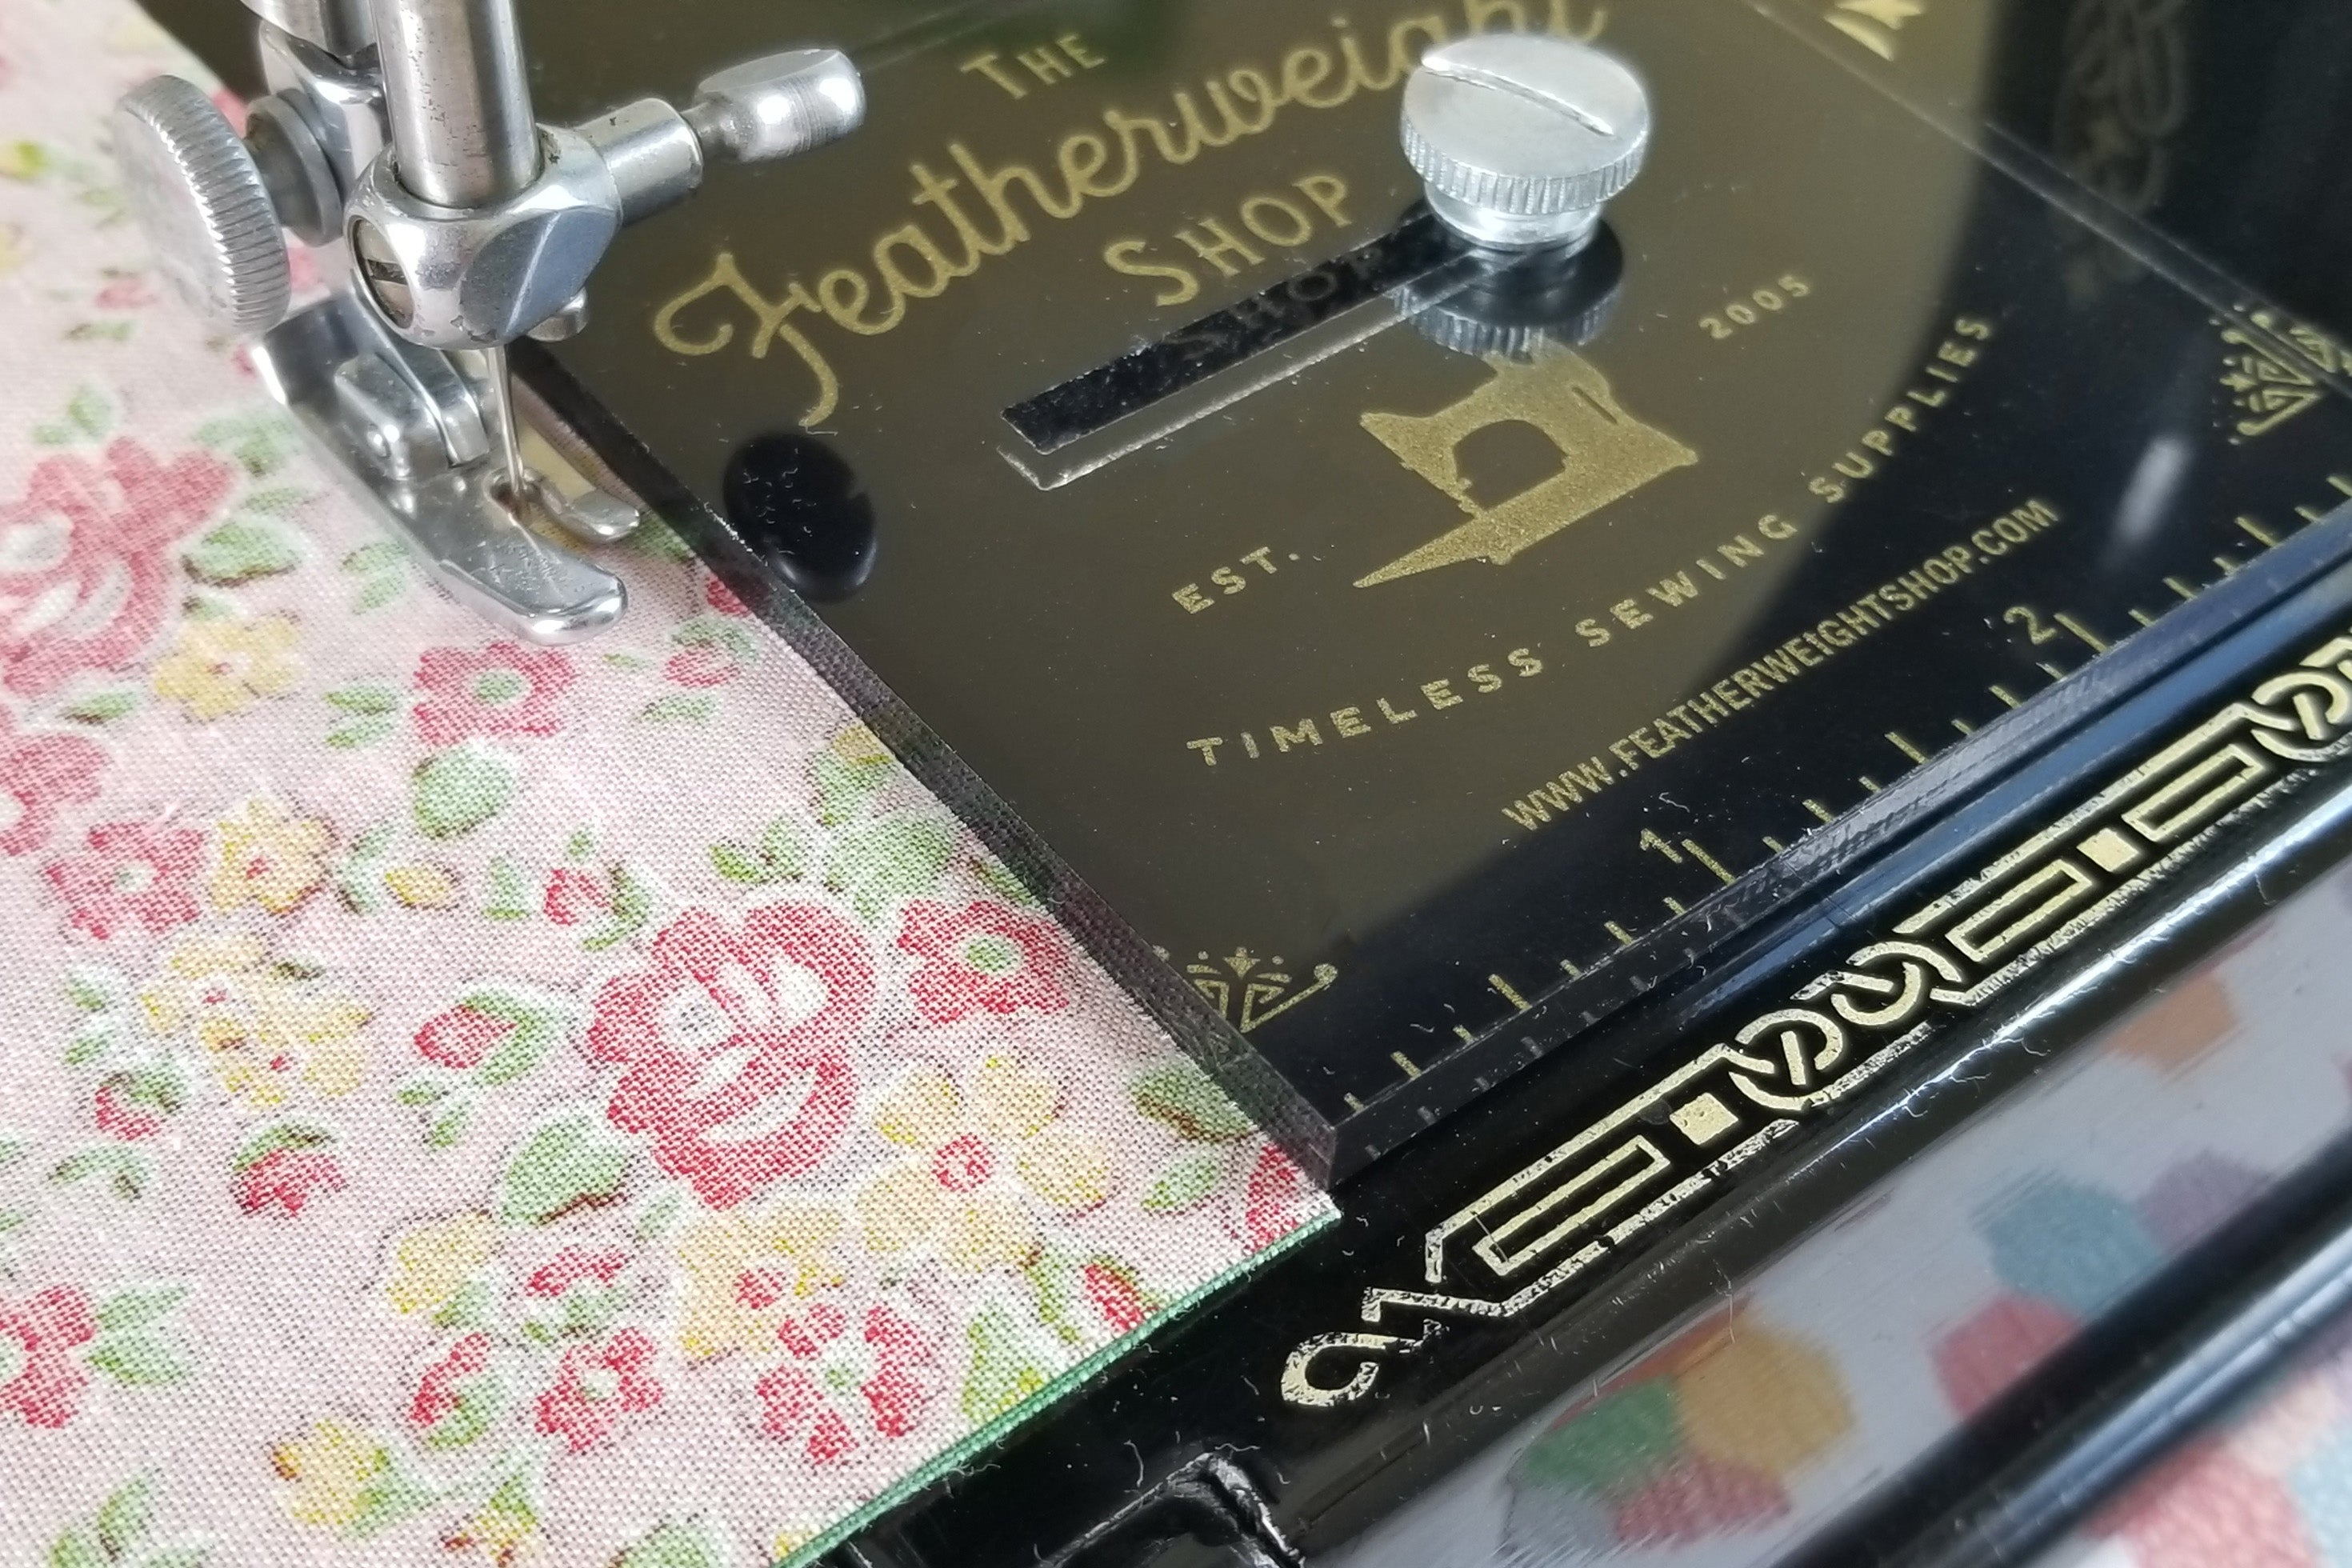
How to Install & Use the Featherweight Accurate Seam Guide & Square
This seam guide is designed so that you can easily and accurately piece your quilt blocks. Whether you prefer a scant or a true quarter inch (1/4") seam (or even beyond), your seams will have consistent seam allowances throughout your quilt or sewing project. Some people prefer a 1/4" foot at...
Read More
How to Make a Buttonhole and Eyelet Hole (perfect for the Mini Dresden Spool Pin Plate Pattern)
Isn't it darling?!! We are so excited to make this free pattern available to you! Click here to subscribe to our newsletters and receive the FREEDresden Spool Pin Plate PDF pattern link Follow the link above to subscribe to our newsletter, because only subscribers will receive access to th...
Read More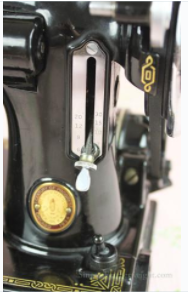
How to Adjust the Stitch Length Lever
Yesterday, there was a question on our Facebook group about the stitch length lever (or sometimes called the "stitch length regulator") and so this video tutorial was made to help answer that question as well as addressing a couple other things, too. I will show you what to do if the lever is too...
Read More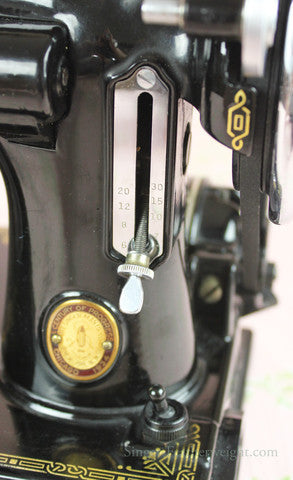
How to Adjust the Stitch Length Lever
Yesterday, there was a question on our Facebook group about the stitch length lever (or sometimes called the "stitch length regulator") and so this video tutorial was made to help answer that question as well as addressing a couple other things, too. I will show you what to do if the lever is to...
Read More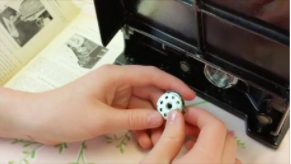
How to Thread a Featherweight Bobbin Case (Getting to Know Your Featherweight, Part 2)
How To Thread the Bobbin Case & Insert It Into the Machine Ruthie continues with her Getting To Know Your Singer Featherweight 221 series and shows us how to correctly place the bobbin into the bobbin case as well as how to insert the bobbin case into the machine. A couple of things to remem...
Read More
How to Straighten a Bent or Loose Spool Pin
If your spool pin is bent or a bit loose then this video tutorial will show you how to straighten and tighten it back down. You'll need a very hard surface, a hammer, and a metal punch because you'll be flaring the pin from the underside of the plate.
Read More
How To Replace the Electrical Components
This video tutorial will show you how to replace and rewire the light socket, lampshade, light switch, receptacle and motor on a Singer Featherweight 221. If you have any questions, don't hesitate to contact us. Also, be sure to like and share this tutorial with your fellow Featherweight friend...
Read More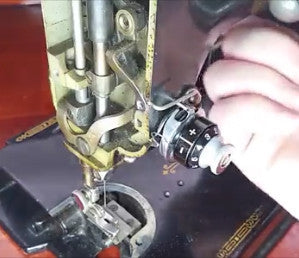
How to Align the +/- Indicator Ring on the Tension Unit
This quick video will show you how to make a tension unit post adjustment. If the +/- indicator ring at the top of your tension unit is sitting a bit off center on your Singer Featherweight 221 or 222K, then this tutorial will walk you through the steps for how to get it properly aligned again.
Read More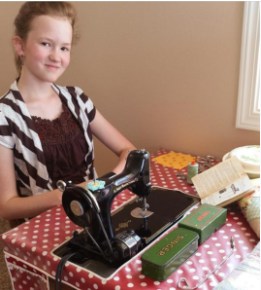
How to Wind a Singer Featherweight Bobbin (Getting to Know Your Featherweight, Part 1)
How to Wind a Singer Featherweight Bobbin Not quite sure where to start with your new-to-you Singer Featherweight 221? Then let's get started with our new series "Getting to Know Your Featherweight", where our 12-year-old daughter, Ruthie Henry, goes through the pages of her instruction manual an...
Read More
How to Use the Singer Buttonholer Attachment
Beautiful, perfect and easy! ‘Sew’ easy in fact, it’s practically hands-free! Believe me, this buttonholer is still preferred by long-time sewists, even over the fancy, expensive machines with built-in buttonhole features. It’s amazing how the technology of yesterday still holds true all these...
Read More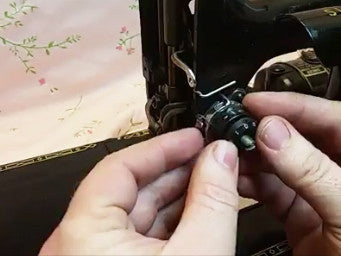
How to Disassemble and Reassemble the Tension Unit
This video tutorial was made kind of spur of the moment, but it has been quite helpful on the Singer Featherweight group on Facebook. Learn how to easily disassemble, clean and reassemble the Singer Featherweight 221 and 222K Tension Unit.
Read More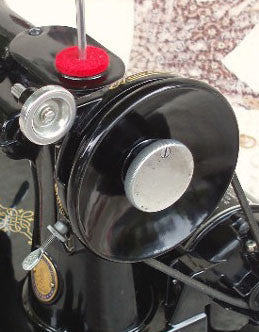
If your Singer Featherweight 221 or 222K has a needle that won't stop going up and down and still moves when winding a bobbin, then most likely your handwheel needs an adjustment inside. This easy to follow video tutorial not only shows you how to fix the annoying problem but explains the process...
Read More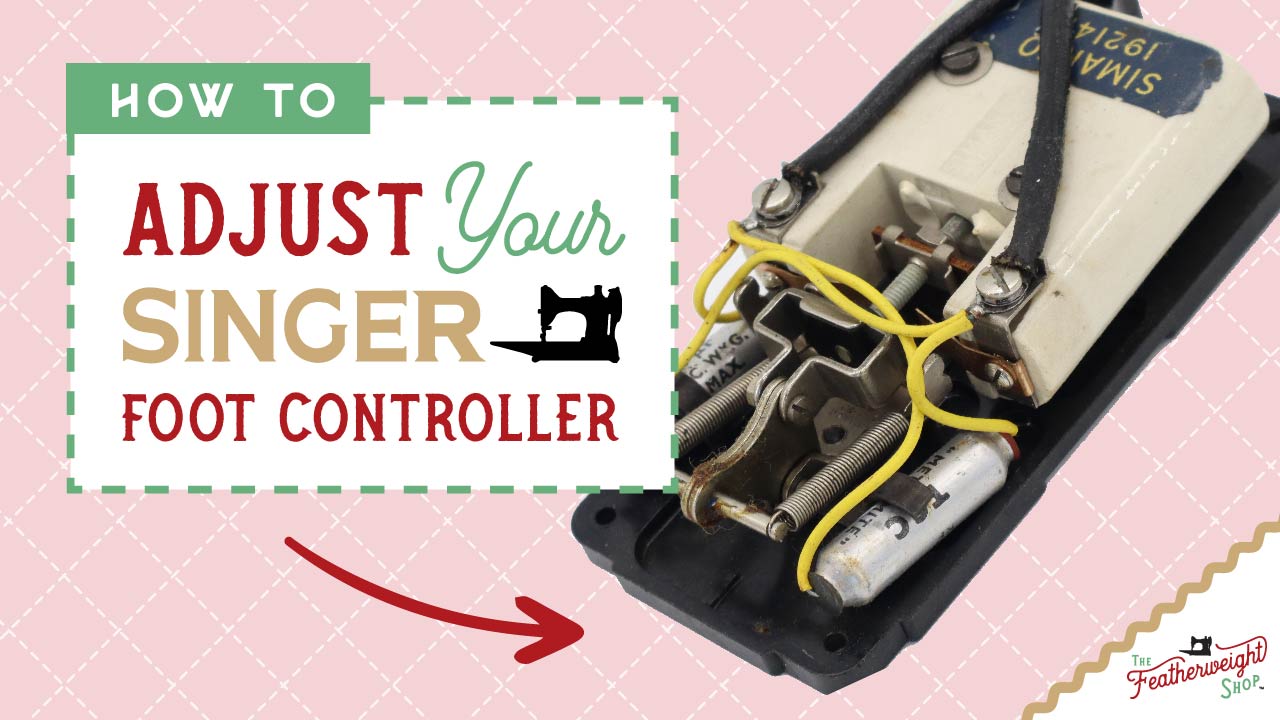
Foot Pedal Controller Speed Adjustment
If your Singer Featherweight 221 foot controller (aka foot pedal) has only one speed (fast) OR is getting way too hot, then it might just need a simple adjustment inside. Watch this video tutorial for how to calibrate and make the necessary adjustment and to keep your machine operating safe...
Read More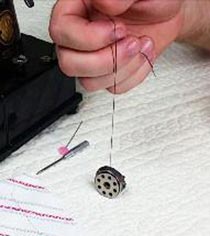
How to Clean Under the Bobbin Case Spring
This is just a quick video we made for a customer who had questions about the bobbin case tension. This tutorial will help teach you how to clean lint out from under the bobbin case spring with a pin as well as how to do the bobbin case "yo-yo" test. This test is not foolproof and can sometimes v...
Read More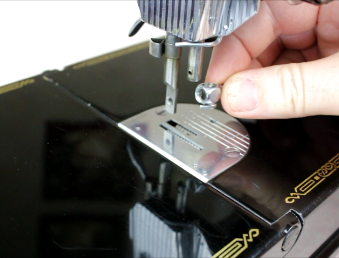
Replacing the Needle Clamp & Thread Guide
When replacing the needle clamp or thread guide, sometimes it can be a bit tricky to get everything aligned just right. This video tutorial will help you learn how to easily replace the needle clamp and thread guide on your Singer Featherweight 221 and 222K.
Read More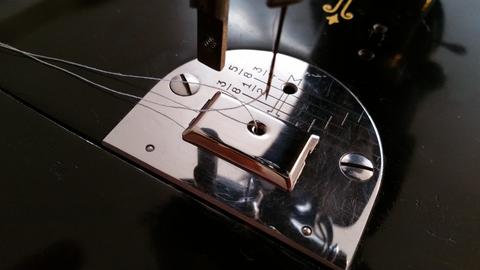
How to Attach the Feed Dog Cover Plate
We here at The Featherweight Shop are really excited to introduce the feed cover plate designed specifically for the Singer Featherweight 221. It is an exact replica from the very, very scarce-to-find (and expensive) original feed cover plate attachment. Unlike the plates that screw onto the b...
Read More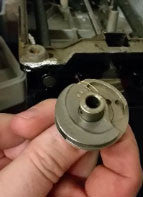
How to Fix a Stuck Hook Assembly
After removing the hook assembly screws on a Singer Featherweight 221 sometimes the assembly will still remain stuck on the shaft. This quick tip will help you remove it easily without damage to your machine or that expensive original part... just be sure to watch all the way to the end of the vi...
Read More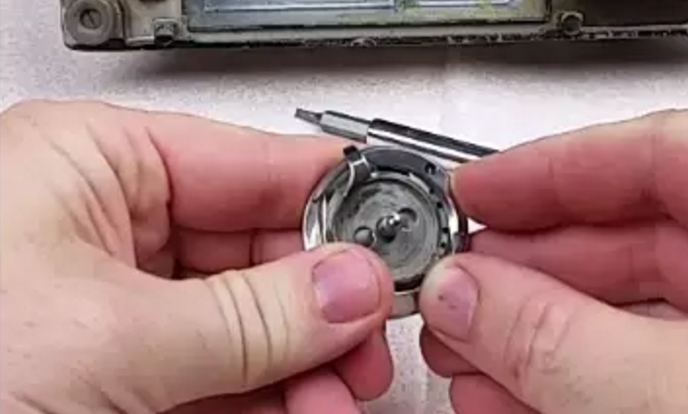
Featherweight Timing (and how to replace the Gib Hook)
In this video tutorial, Carmon Henry gives the step-by-step process for how to set the hook timing on a Singer Featherweight. Timing is almost never an issue on a Singer Featherweight 221 or 222. What that means is -- that it is virtually impossible for a Featherweight to get out of time just f...
Read More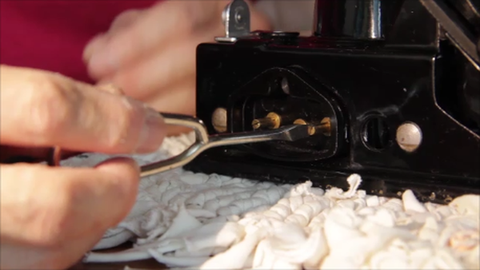
How to Fix Terminal Receptacle Pins for Better Connection
How to Fix Terminal Receptacle Pins for Better Connection A common question we receive has to do with the Featherweight plug being too loose in the receptacle. Watch the short video above to see what to do should this ever occur with one of your Featherweight machines. My Featherweight fri...
Read More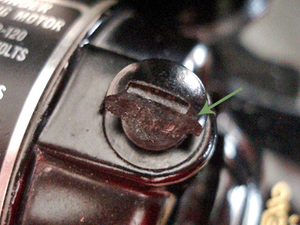
Fixing a Broken Motor Cap Screw
Broken Motor Cap Screw This Featherweight Hint has been provided to us by Brad Sawatwipachai. Brad is a friend and Featherweight collector in Ontario, Canada. He recently hosted his first Featherweight Maintenance Workshop and posted photographs of something he had to remedy while in his clas...
Read More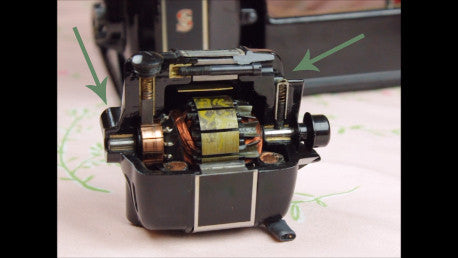
Learning About Motor Felt Wicks
There has been much talk about motor lubricating lately, including many that are advocating not lubricating the motor at all. I am not sure where this advice started, whether it began because the later white Featherweight motors do not have lubricating ports, or if it was from those warning agai...
Read More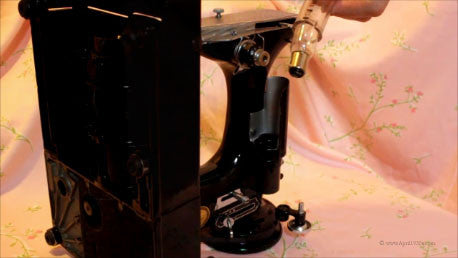
How to Change a Singer Featherweight Light Bulb
For those of you who do not have local access to a hardware store or don't want to drive all over town trying to locate the right tubing product, we do carry them in the shop as a convenience to our customers: Many of you have probably tried and found that the area where the light bulb g...
Read More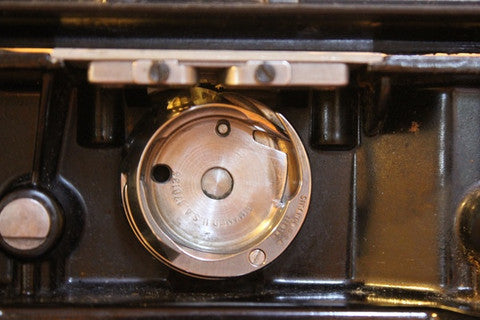
Hook Assembly with Bobbin Case Base Removed April 7, 2020: UPDATE & ADDENDUM, New Video Tutorial In September of 2014, we posted a Video 1 Tutorial showing how to remove thread from the hook assembly on a Singer 221. Then, in May, 2018, we updated the video to add the tutorial for the...
Read More
How to Use the Singer Tucker Attachment
How to sew pintucks using an old-fashion Singer Tucker Attachment. This demonstration was with a Singer Featherweight 222 Sewing Machine. The video was created back before we had cell phone video coverage, and we could only do it in one take with our limited technology. But, this should help gi...
Read More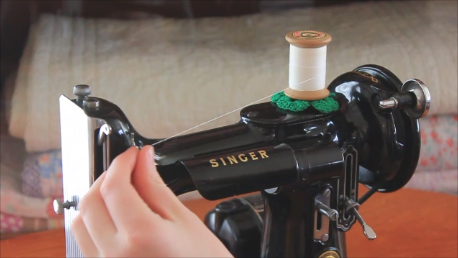
How to Thread a Singer Featherweight
Is your machine skipping stitches, or looping strangely after it was sewing just perfectly moments before? Most all stitch problems on a Singer Featherweight have to do with the way it is threaded. Unlike most modern machines and even a few older Singer models, the Featherweight 221 & 222...
Read More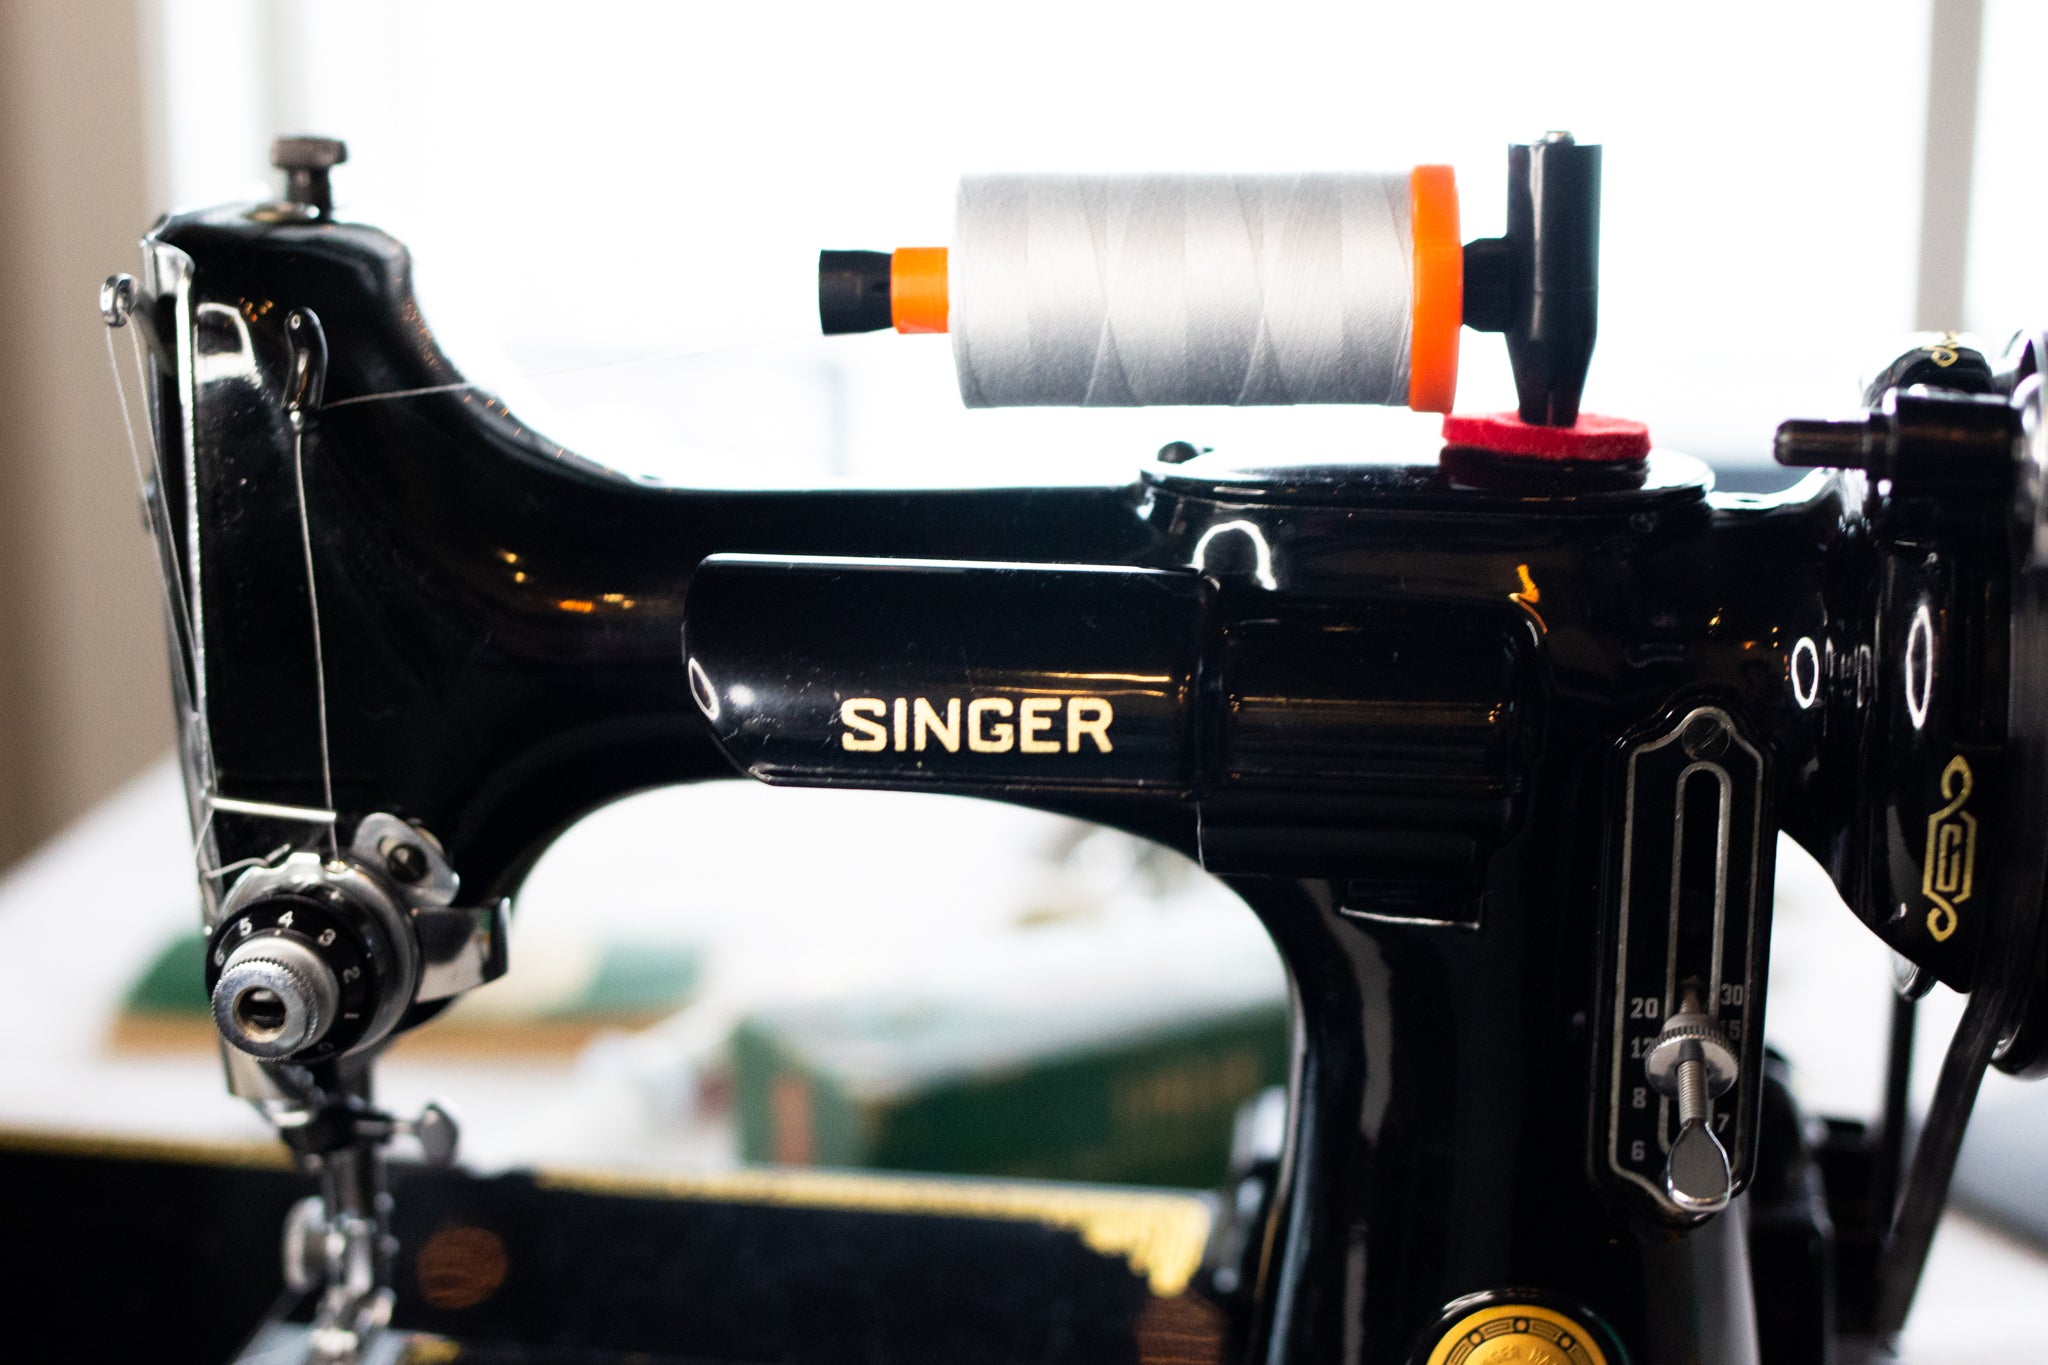
Introduction to Getting to Know Your Featherweight Video Series
Welcome to the Getting to Know Your Featherweight Video Tutorial Series! Ruthie Henry demonstrates each step needed to get you and your Featherweight up and sewing in the seven part course! Starting from How to Thread Your Singer Featherweight all the way through Backstitching & Reverse Stitc...
Read More
How to Use the Two Thread Embroidery Attachment
This is rather strange looking attachment, wouldn’t you say? I likened it to a preying mantis because of how the thread arms reach out and the bottom arms crisscross… Nevertheless, this is a very, very scarce attachment to find indeed! We know this attachment is expensive. It is quite a collect...
Read More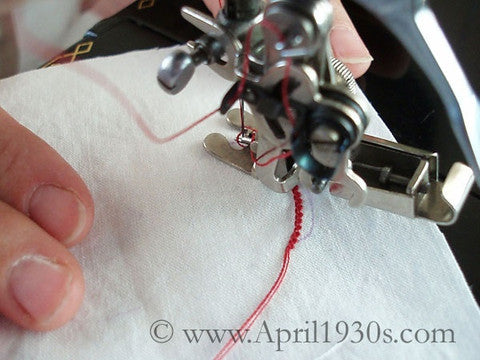
How to Use the Single Thread Embroidery Attachment
I have had many, many rare attachments over the years but this one is by far my very favorite to use. Curly-Q’s and Loopy-D-Loops make this attachment fascinating to watch! The Single Thread Embroidery Attachment was made by the Singer Manufacturing Company beginning in 1930 and continuing...
Read More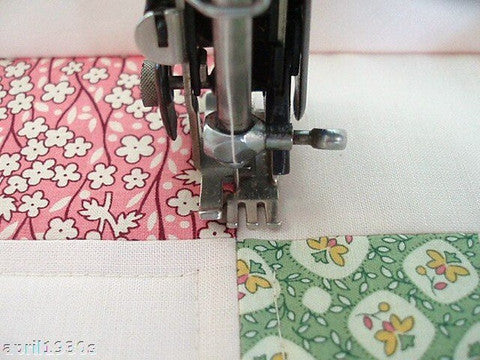
How to Use the Singer Walking Presser Foot
This Walking Foot is in a class all by itself. But then, should it be any surprise coming from the SINGER of yesterday? All metal, sturdy, high quality and with no plastic parts – it was built to last! Those factors alone help play a major role in the collector’s price tag that these fetch tod...
Read More
How to Free-Motion Quilt on a Singer Featherweight
You can follow along with the video tutorial below for how to free-motion quilt on your Singer Featherweight or read through the text further down. Click Here To Order Embroidery Foot Click Here To Order Embroidery Foot The foot I am demonstrating today is a new, all-metal, low shank embroi...
Read More
The Importance of a Thread Stand on a Singer Featherweight
Learn about the various types of thread spools and why a Thread Stand is important for proper tension on a Singer Featherweight! In the original days of the Featherweight, the only thread spools available were the wooden "stacked" spools, designed to spin as the thread was gently pulled strai...
Read More
Is your Featherweight a bit sluggish or does the belt slip when you sew? This quick tip for how to adjust the belt will help you remedy the problem in no time at all. The first thing you will want to do is remove the spool of thread as well as the bobbin case from the machine. Next, using a long...
Read More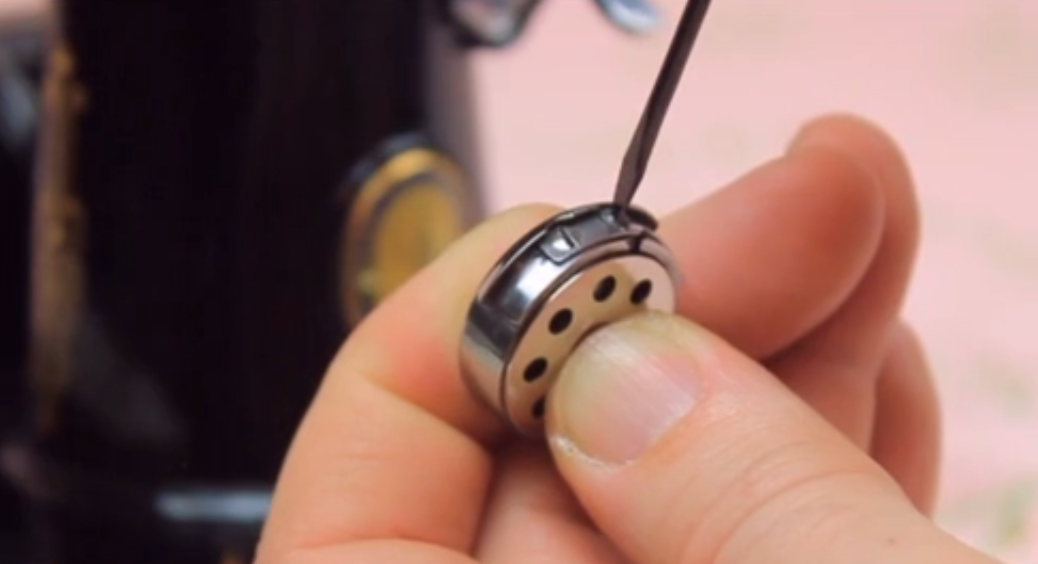
How to Adjust Tension on a Singer Featherweight
Learn how to easily and properly adjust the upper tension as well as the bobbin case tension on your Singer Featherweight 221 and 222. Below is a transcript of the video above. If you have any questions, do not hesitate to contact me. I am happy to assist anytime. If the video was helpful for ...
Read More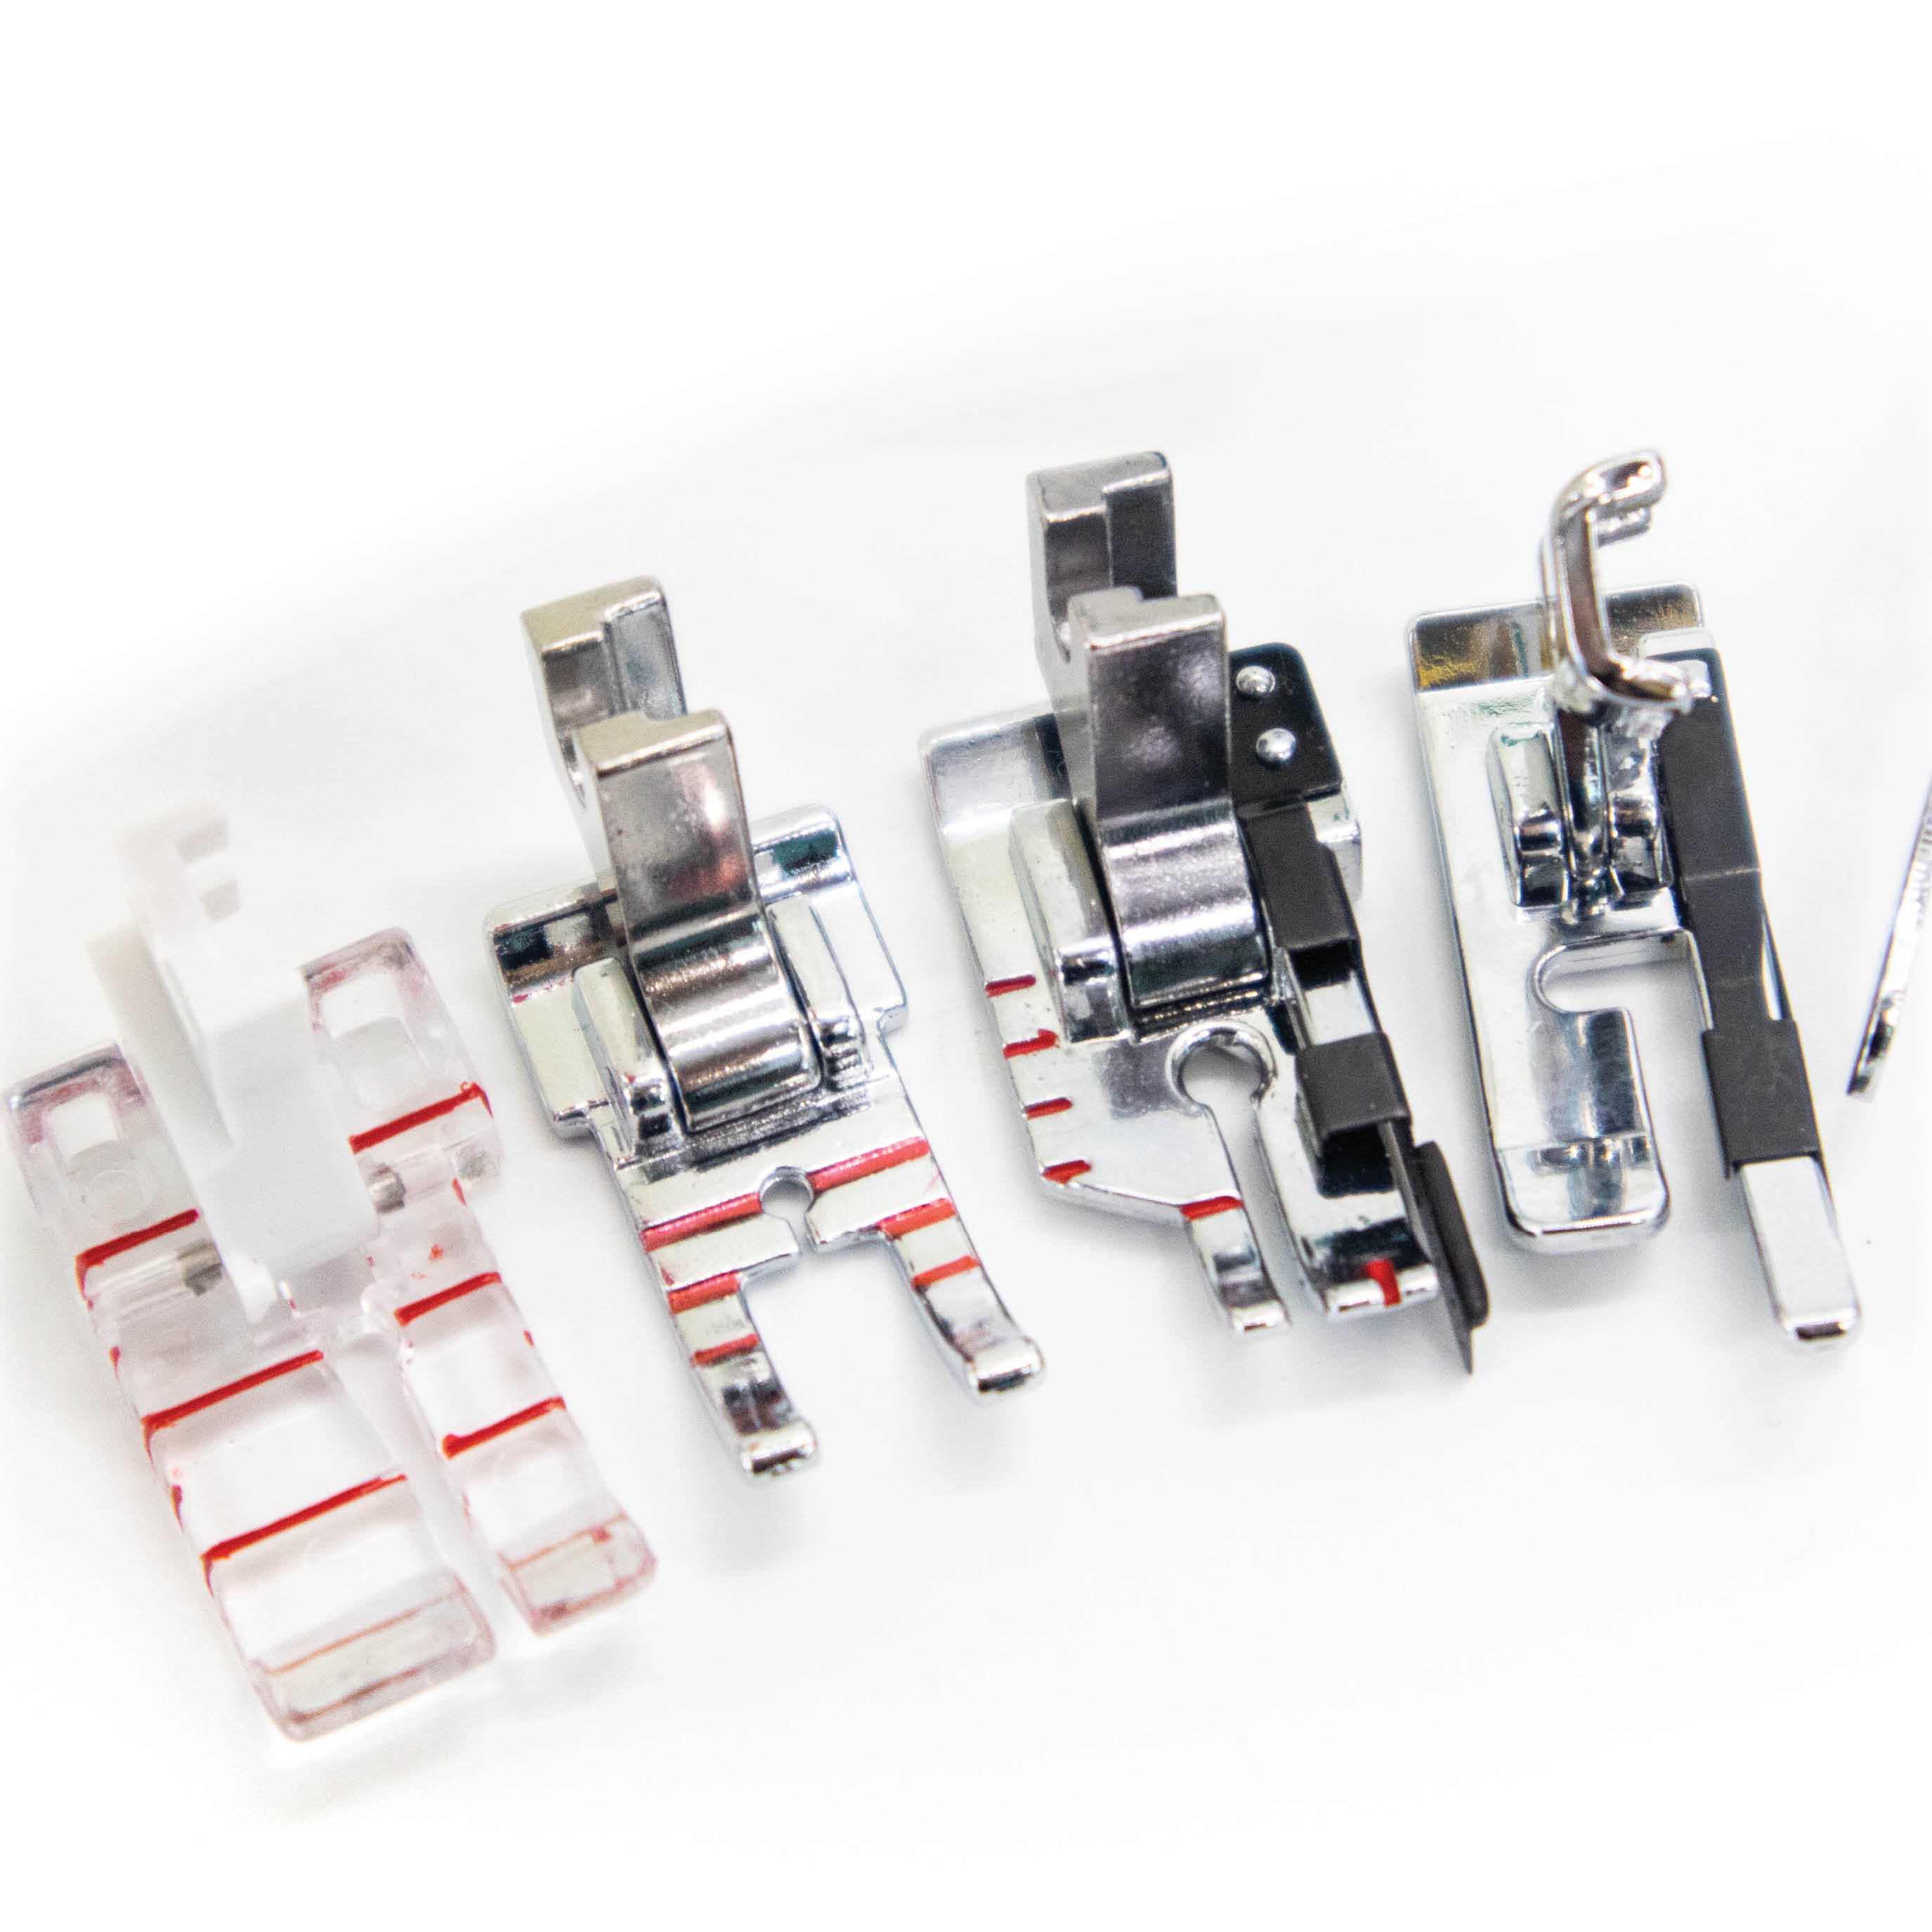
Quarter 1/4 Inch Foot Comparison
We often receive questions about the various quarter-inch feet that we carry. I had been wanting to do a comparison video for quite some time so I made this video tutorial showing the Scant 1/4" Foot, True 1/4" Foot, Spring Hinged 1/4" Foot, Patchwork 1/4" Foot, Open Toe 1/4" Foot and 1/4" Lit...
Read More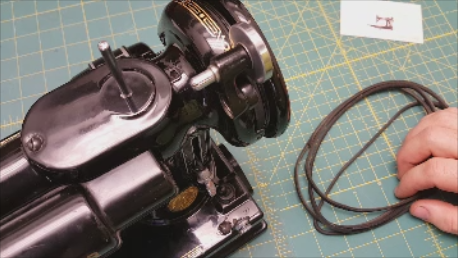
How To Remove and Install a Singer Featherweight Belt
We are sometimes asked when to replace a Featherweight belt as well as how to remove and install a new belt. This video tutorial will show you examples of some bad belts and what to look for, as well as the proper way for installing it. Another thing to take note of is the motor pulley because ...
Read More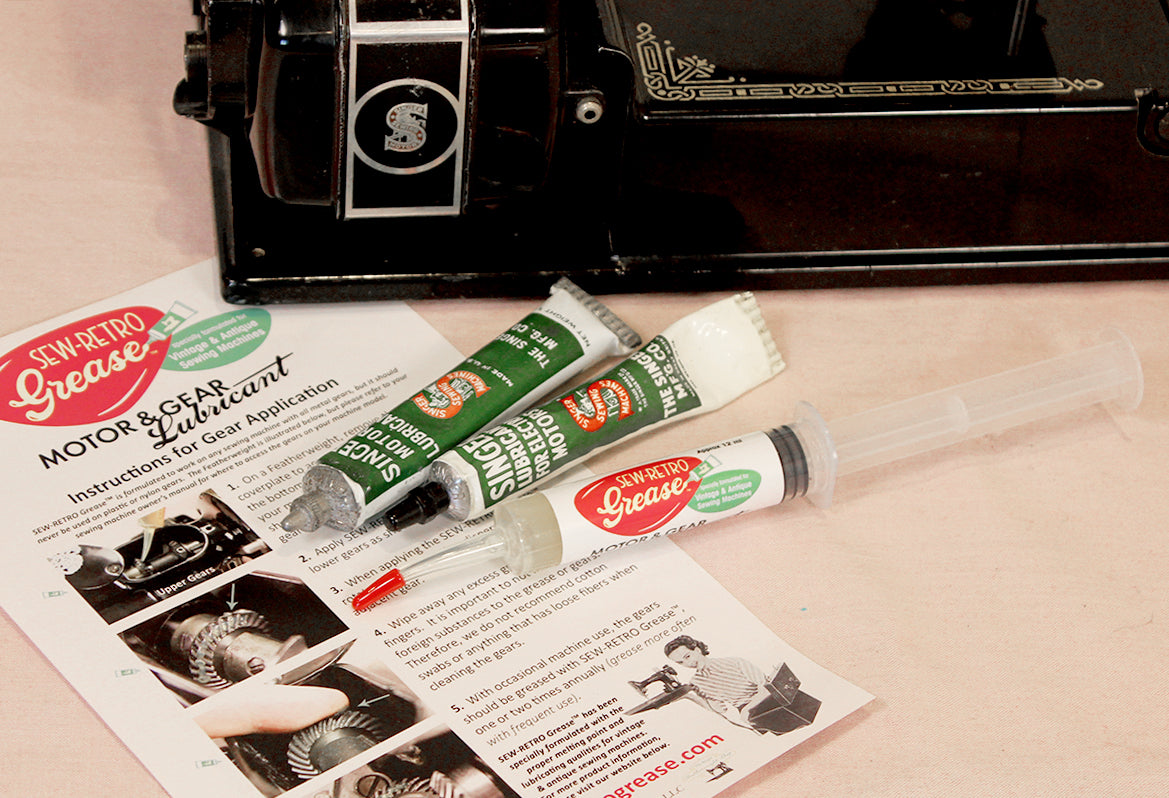
Motor Lubricant and the Proper Melting Point for Sewing Machine Motors
Are you using the right motor grease and lubricant for your Singer Featherweight? There are old, original tubes, new tubes and even some new kinds on the market... but are they properly suited for the Singer Featherweight? How would you know? Watch the video tutorial above and our old one b...
Read More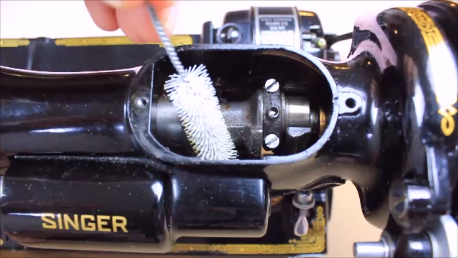
How to Clean & Lubricate Your Gears and Motor
Learn how to properly clean and lubricate your Singer Featherweight 221 & 222K sewing machine gears as well as the motor. Video tutorial walks you through each step for where to apply the lubricant. If you do not have the right grease on hand, then scroll down below the video to order a tube...
Read More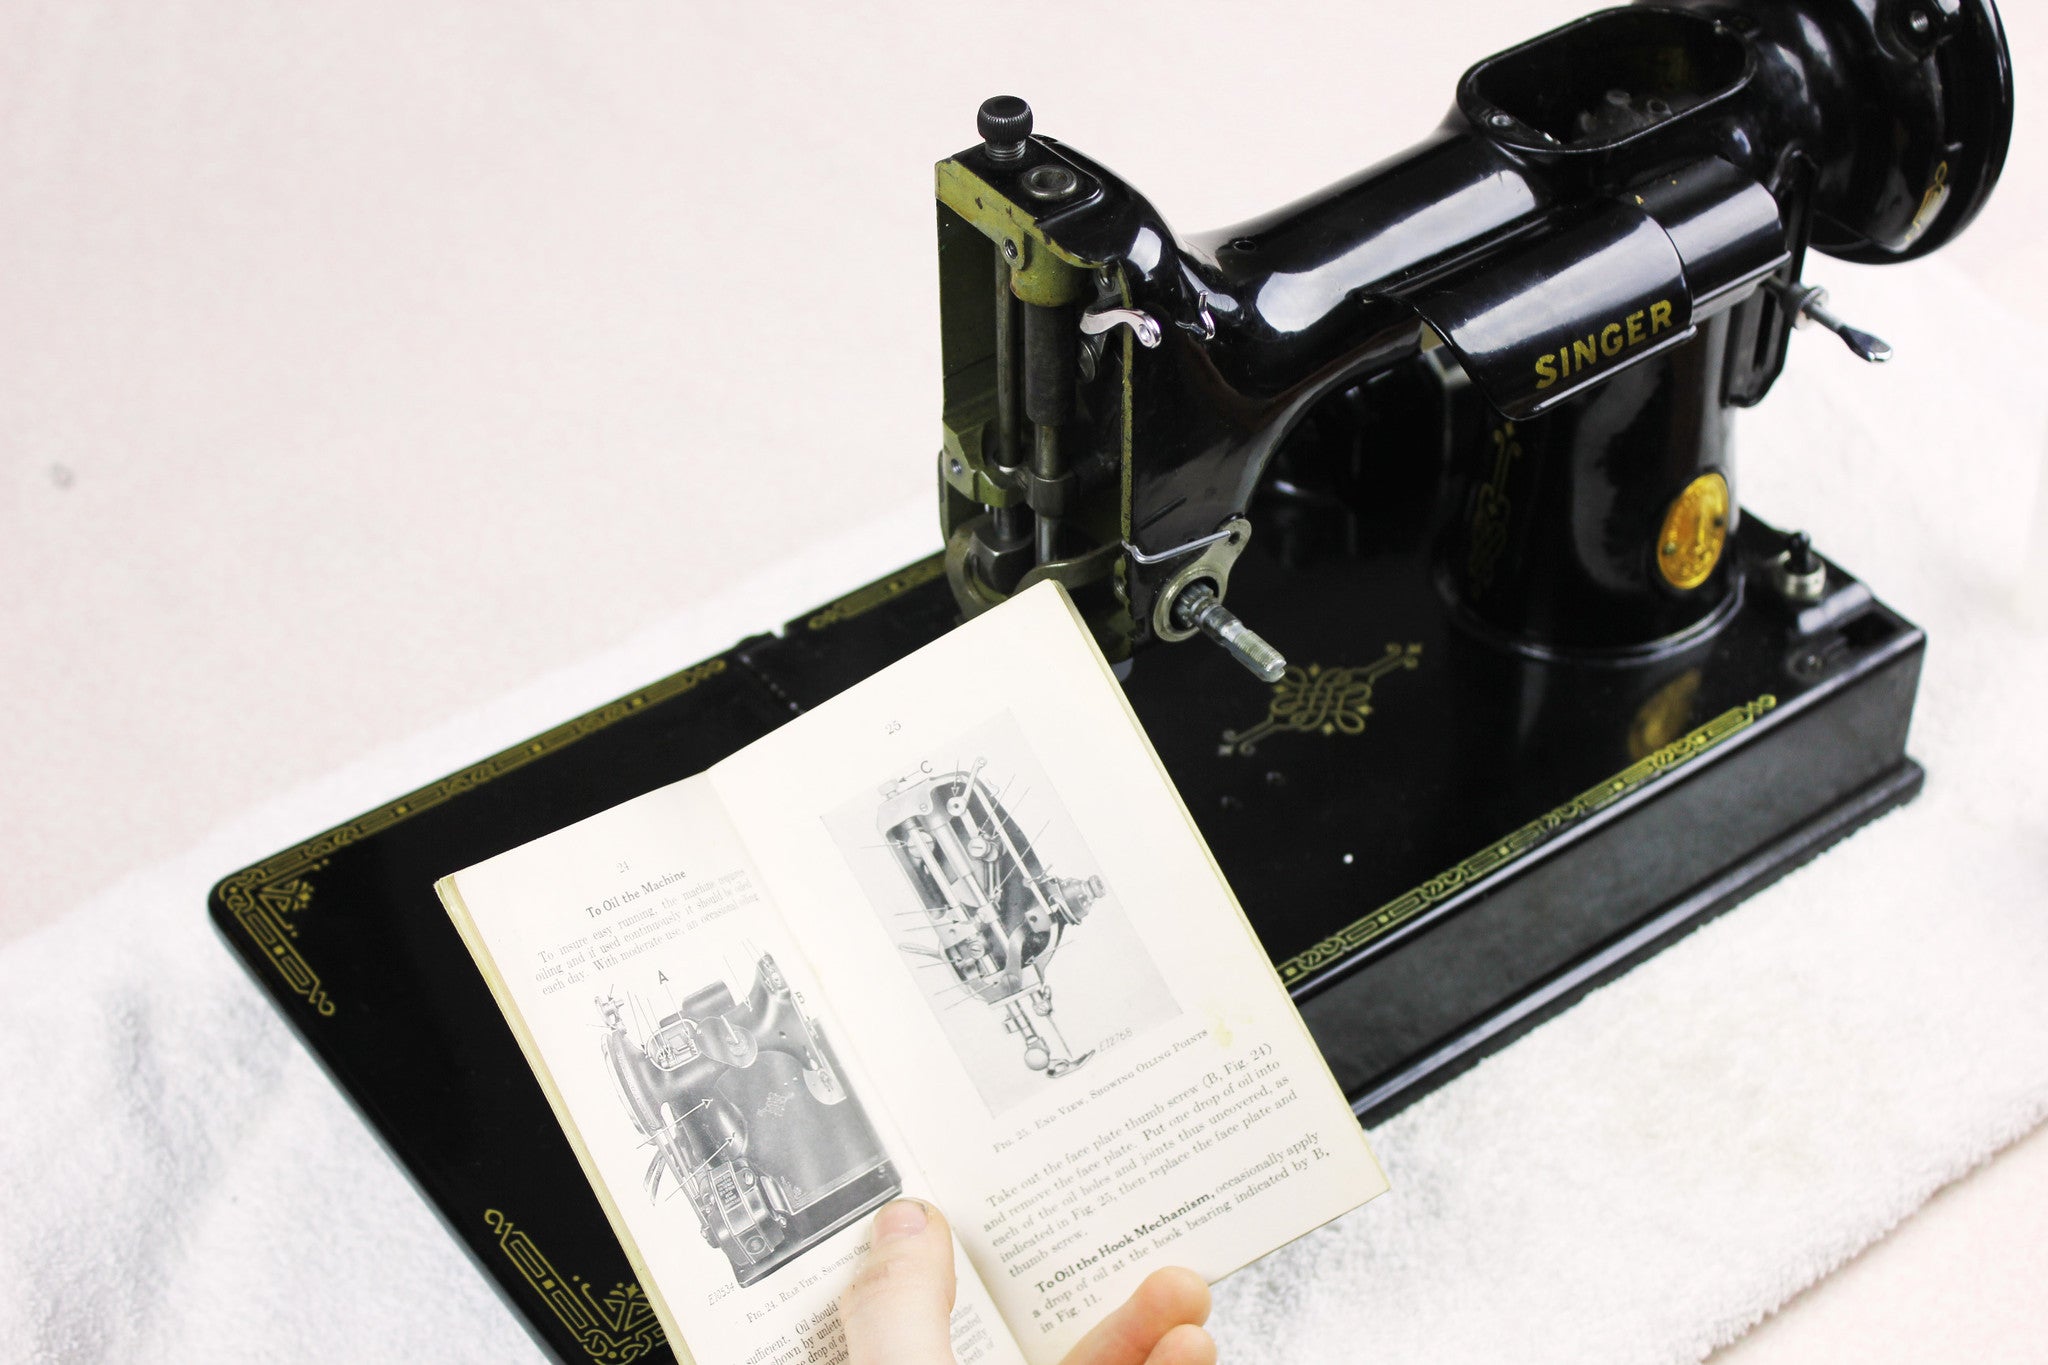
How to Oil Your Singer Featherweight 221 Sewing Machine
Give your Featherweight a "Spa Day!" This oiling tutorial will teach you every step of oiling your Singer Featherweight 221 Sewing Machine and is geared more towards routine maintenance. HINT: If you have discovered after opening up your Featherweight that the gear mechanisms are covered with ...
Read More